Wind & Sun Farm – A Permaculture Design (Part 2)
- Milton Dixon
|
Part 2 of 2
Current Conditions
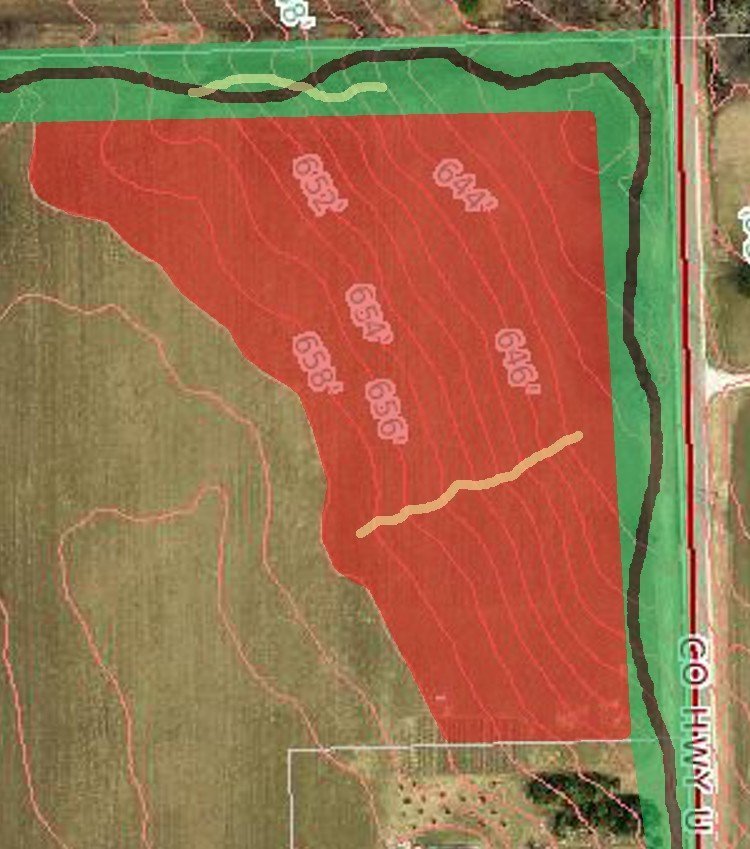
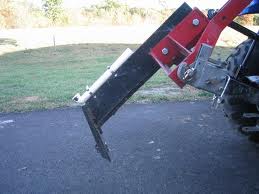
Permaculture Design Recommendations Keylining and Swales In order to deal effectively with the two distinct areas of erosion, (cream colored squiggles in aerial photo below) while simultaneously preparing the soils for an abundance of food production, we recommend keyline plowing in years 1 through 3. Keylining is done until dramatic improvement to soil quality is achieved. Keyline Plowing The keyline system follows the natural topography of the land. It uses the form and shape of the property to determine the layout and position of farm dams, irrigation areas, roads, fences, farm buildings and tree lines. In its simplest form, keyline plowing takes excess water during large rain events and moves it evenly and deeply across the landscape with the use of a subsoil plow. The keyline-subsoil plow digs furrows underground from the source of excess water (erosion or run-off areas) and by plowing along the contour of the land while simultaneously cutting slightly down hill (about 1 foot of drop for every 500 feet of distance) we effectively move the water slowly across the total landscape underground. P.A. Yeomans (1904-1984) developed a special foot for his plow but a standard subsoiler can work if that is all that is available.
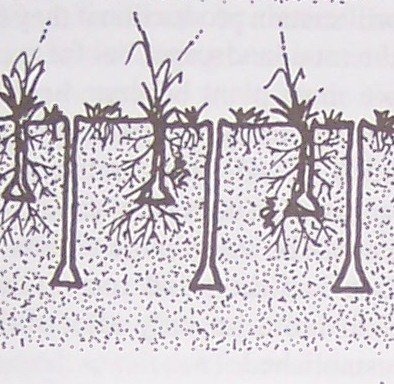
The illustration below (from Bill Mollison’s book, Introduction to Permaculture) shows an underground cross section of the results of pulling a subsoil plow through the soil at two different depths a year apart. Note the channel that is created that becomes very effective at absorbing and moving water while bringing oxygen deep into the soil. The slices in the soil make it easy for water, oxygen and organic matter to wash deep into the soil and also provides easier access for roots which add even more organic matter as plants and roots grow more quickly. To spur things along, farmers can place livestock in these areas or spread manure. The first rains wash these animal nutrients deep into the soil. The insertion of a compost tea while ripping the ground is also being experimented with along with the sowing of nitrogen fixing plants such as vetch, peas and beans.
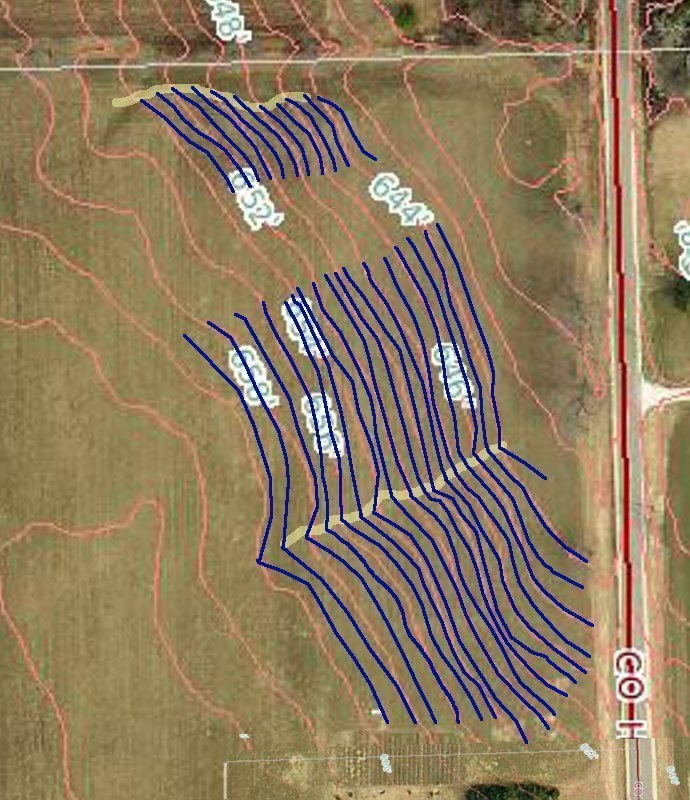
The first time keyline plowing is implemented, the blades are set about 12-18 inches apart and pulled at a depth of about 6 inches, or about 2 inches below the existing mass of roots. This is best done after harvest and before the fall rains. Seeding in nitrogen fixing legumes during, or immediately following the plowing is recommended for rapid vegetative grow and for the adding of biomass above and below the surface of the soil. The following fall the process is repeated, but this time the cuts are 3 inches deeper (9 inches?) and 18-24 inches apart. Grazing animals or spreading manures before the rains come is always a good idea. Year three the process can be repeated once more at an additional 3 inches of depth (12 inches?) and 24-36 inches apart. Repeat the seeding, grazing and/or manuring as before. The illustration below shows how the keyline plow can be dropped into the eroded areas and then pulled slightly downhill from contour.
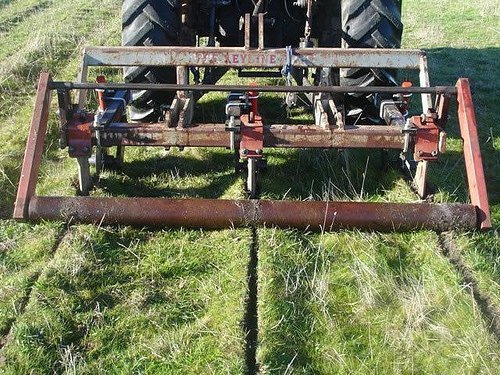
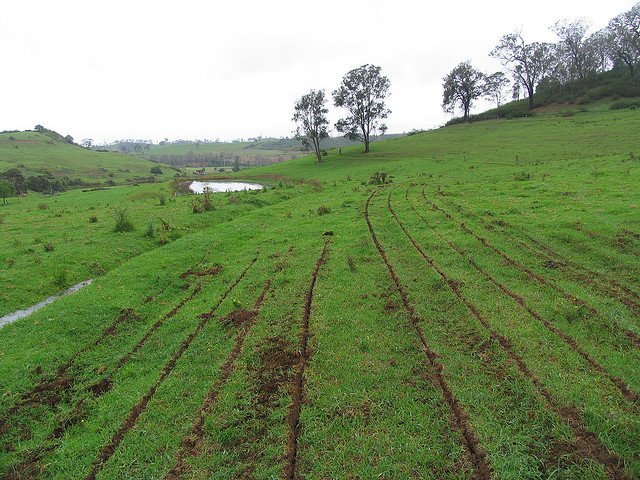
Here is a look at a field immediately following keyline plowing. There is no turning of the soil. The grasses and other plants stay in place, holding the soil while water is captured and newly planted seeds emerge.
The Addition of Swales – Year 4-6
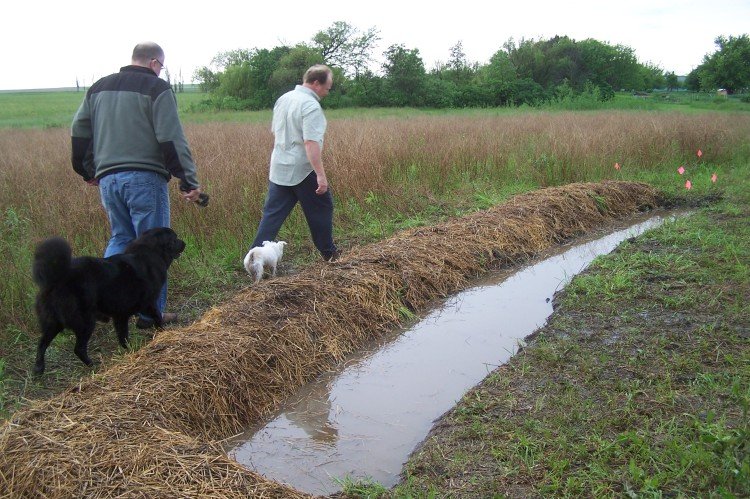
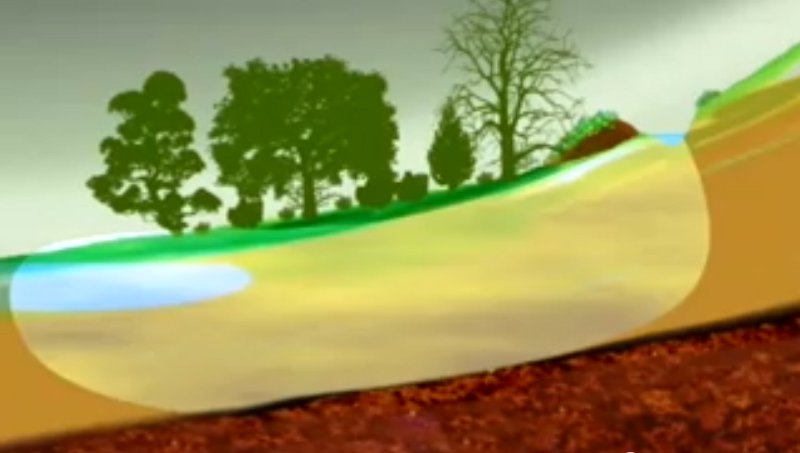
A swale is a rain water harvesting ditch dug on contour. Whenever rainwater or snow-melt starts to flow over the surface of the land, a swale will capture much or all of this surplus water and hold it in place long enough for it to soak into the ground. This extra water now begins a slow journey through the soil profile as it seeks the water table or the nearest creek. Below is an illustration of water soakage as seen in Geoff Lawton’s YouTube video on swales.
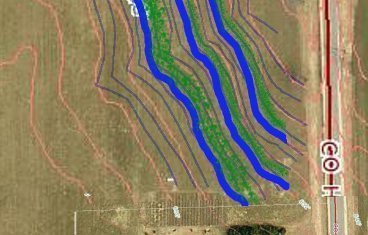
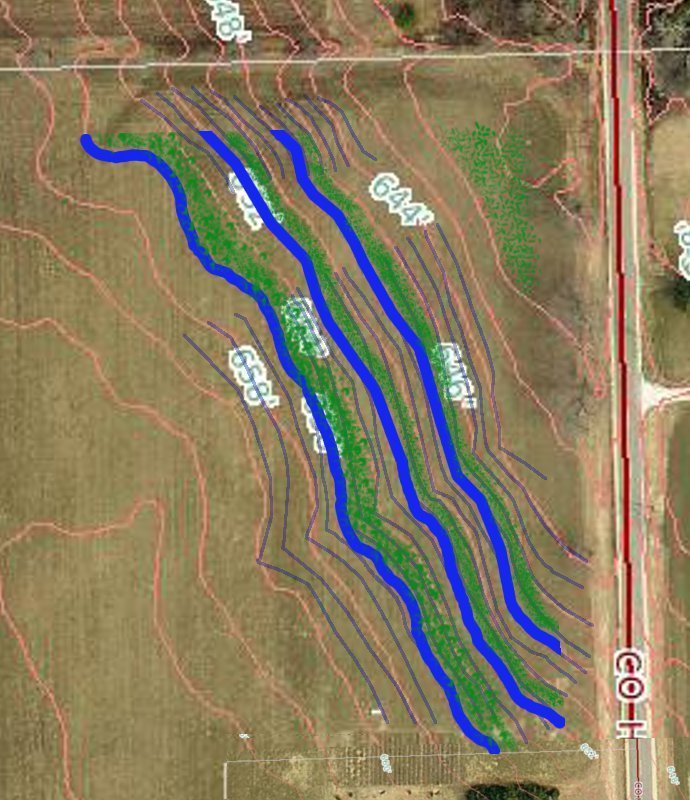
The addition of this water to the subsoil creates a more ideal growing environment for the roots of most deep rooted plants. Even if there were a drought on the surface, the plants accessing this water storage will hardly feel it. We envision three fairly-evenly spaced swales that follow the contour (see illustration below). The green strips on the downhill side of the blue swales represent a diverse collection of plants that will eventually form a linear food forest consisting of multiple plant guilds.
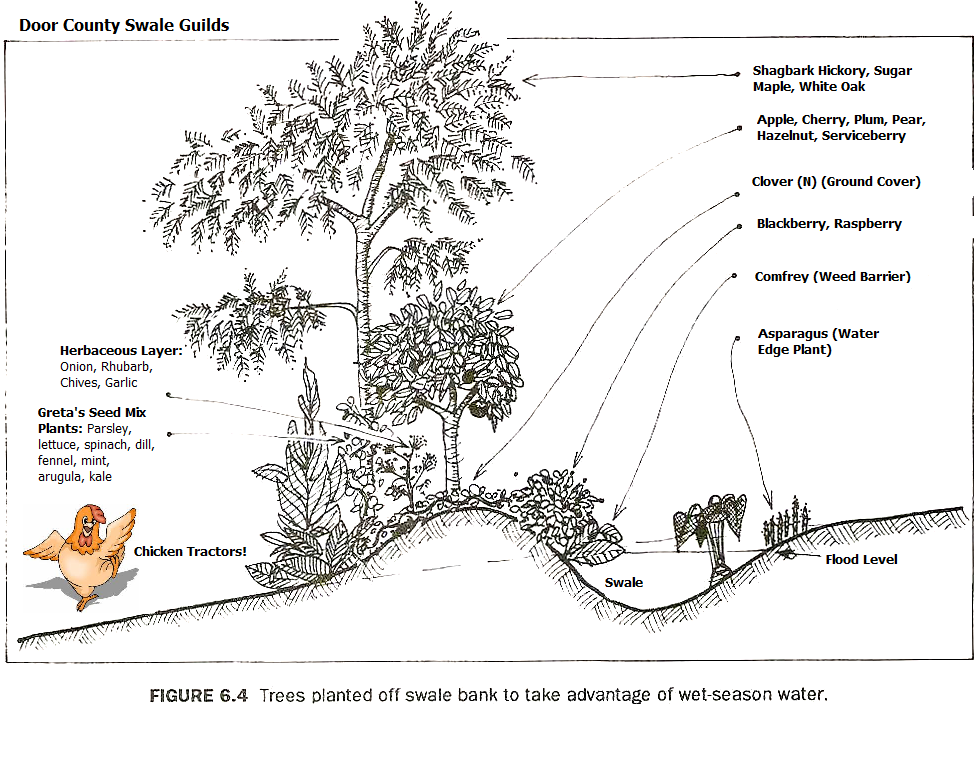
Linear Food Forests With the great example of Sepp Holzer we will model our linear food forests after his prosperous permaculture farm. “Greta’s seed mix” (a take-off of Holzer’s seed mix – Greta is John and Ann’s daughter) would be planted into the land, providing annual fruits and vegetables in addition to the perennial forest garden. The Forest Gardens will be one of the farms main income providers as well as generators of a large amount of food for the farm and community. Following is a more in-depth look at the plant species recommended for the linear food forests. This Illustration can be found in Bill Mollison’s book, Introduction to Permaculture and has been adapted or abridged by us to add plant species that are more native to Door County, WI.
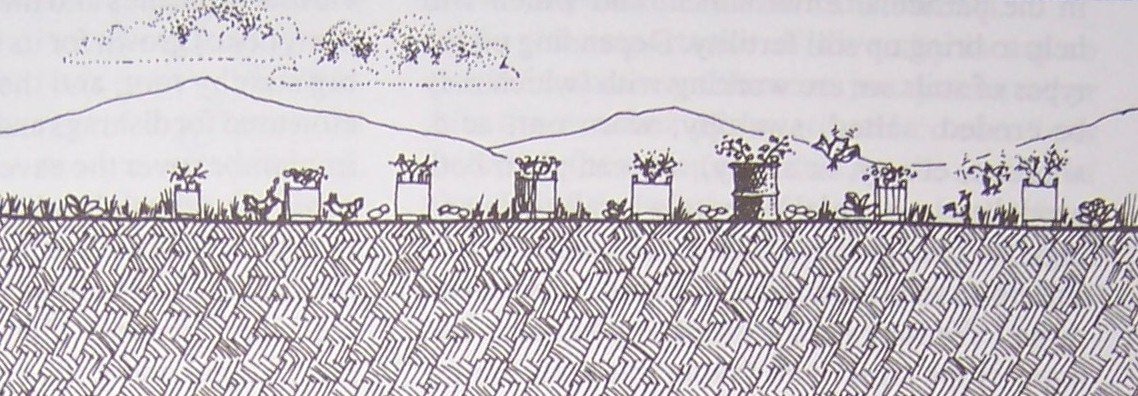
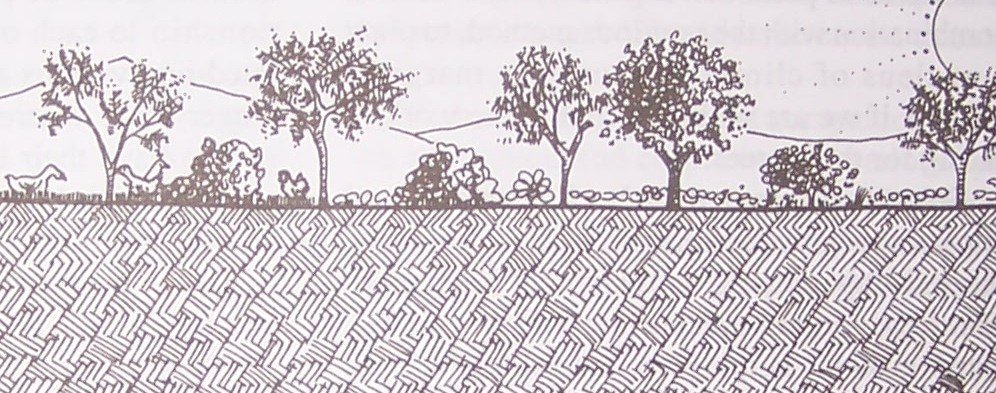
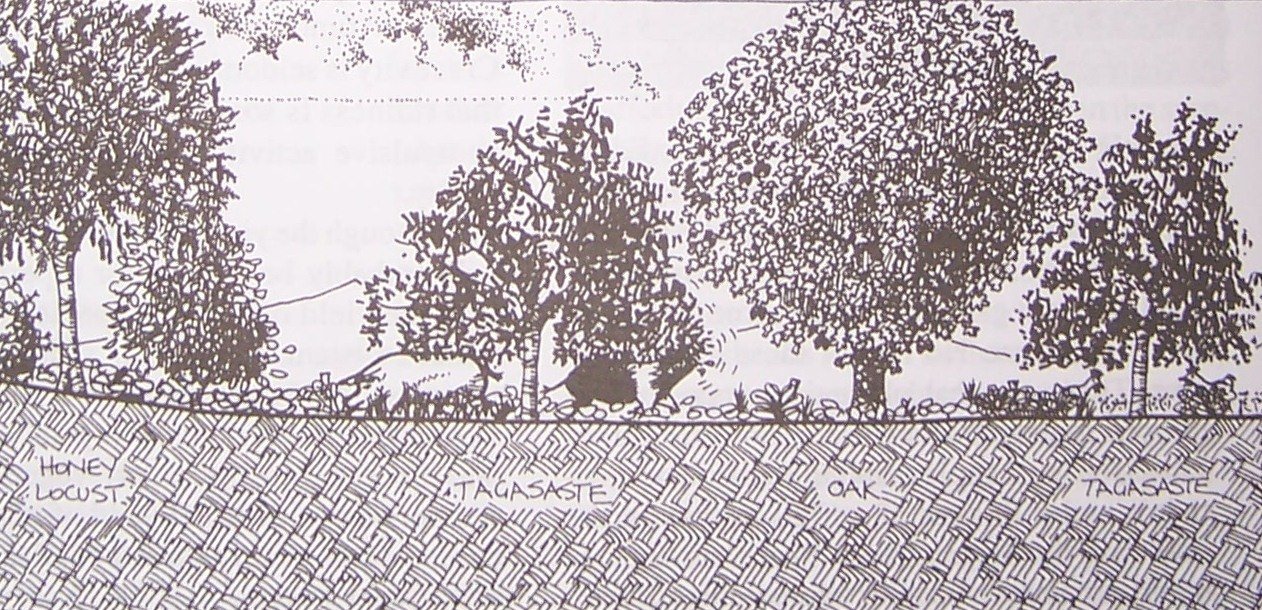
To get a feel for how these linear-swale food forest gardens might look we share a series of time-lapse illustrations from Bill Mollison’s text, Permaculture – A Designer’s Manual. Year 1 – Newly Planted Trees Protected from Rabbits and Chickens Year 3 – Trees Become Established Year 8 – Tees are well Established (able to withstand some animal grazing pressure)
Chicken Tractors: http://www.richsoil.com/raising-chickens.jsp
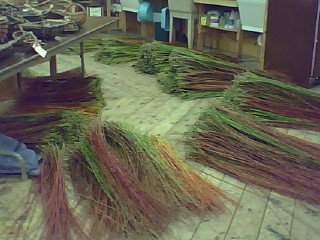
Additional Design Feature The Willow Patch
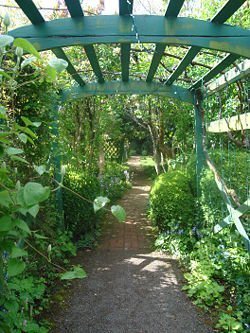
The Wind and Sun Pergola: The idea of building an outside education center and meeting place was discussed with the construction of a pergola that would include a unique Wind and Sun Farm design. A pergola makes a wonderful spot to host a wide variety of educational events which would help make Wind and Sun farm an educational center. Pergolas that support a variety of vegetation can provide beauty, shade, food and a lovely place to hold meetings or to simply relax. This space could become a natural spot for interns and staff to congregate in their time off as well. Reused Wind Generator Blades
Example of Pergola with Food and Shade Producing Vegetation
Implementation Time Line Time Line: Year 1-3:
Time Line; Year 4-6
Time Line: Years 7-20
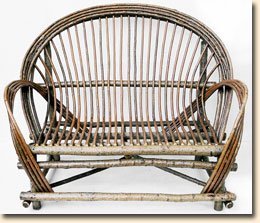
Review of Income Generation Possibilities in Area 2 1) Plant Guilds: Nut trees, fruits, vegetables, herbs. This produce can be sold at a farm stand, farmer’s market, local restaurants, and also be used to provide food for family (community) and interns. 2) Chickens: Meat and/or egg raised and housed in chicken tractors in warm weather months. The chickens will fertilize and aerate the soil, while minimizing common insect pests. 3) Basket and furniture willow can easily be cultivated. As a low input product it can be sold directly to artisans as willow whips, used to create finished items, or sold to florist for flower arrangements. The finished items can be used on the property, or sold at a gallery, farmers markets, or a farm stand. Significantly higher profit is possible with the value-added products. Possibilities are trellises, fences, gates, baskets, or more elaborate outdoor furniture.
4) South Meadow Pergola (made from wind turbine blades, towers, and cables?); approximately 25′ in diameter – this area could be used as an outdoor classroom, a spot for meditation, reflection, music, discussions, etc. Such a structure supports the hosting of seminars, workshops and interns. The pergola can also support winter-hardy kiwis which could be sold as a niche market fruit. Each plant can produce up to 25# of kiwi. 5) Sugar maples provide an opportunity for maple syrup production and sales. Since maple trees grow well in this area and could become part of the buffer areas. Why not consider the food and income value of such a sweet crop? See http://www.umext.maine.edu/onlinepubs/pdfpubs/7036.pdf
Additional work was done on the remainder of the farm and give to John and Ann to review and consider implementing. We’d like to thanks John, Ann and all of the student designers for their excellent work. – – Midwest Permaculture Teaching and Design Team
|


6 thoughts on “Wind & Sun Farm – A Permaculture Design (Part 2)”
I love that with permacultre comes endless possiblities! There is no dead end that current system is heading towards at a rapid pace.
Things are moving along nicely! Is Mr. Hippensteel going to make his own Yeoman’s Keyline plow blades, or get them shipped out from some outfit in Australia?
I’m with Lesa,
“Can’t wait to see the project finished!” Michael Condra & I were chuckling yesterday about how little effort permaculture requires as the sweat was pouring off of our brows, as we worked on the Secret Garden, and watched the rooster eat all of the grapes.
Actually the process may be as rewarding as the finished project. But you have to love good hard work.
Thanks Bill & crew!
John
PS: Thanks Larry for your comment. The time to get started in now! Don’t think I don’t reflect 10 years back on how I wanted to get started then, make that 15 years back.
[img]https://b2792463.smushcdn.com/2792463/wp-content/uploads/2011/09/Sunsetthroughgrass82111lrDSC00965.jpg?lossy=0&strip=1&webp=1[/img]
It’s interesting to think about the time frames involved. Makes one realize that the time to get started is now at the latest!
Thank you so much for the detail and pictures. I have been reading Permaculture,but it is sometimes difficukt to put it all together. This piece explains it all inn detail using diagrams and pictures. I cant wait to see the project finished!
You bet Lesa…
We have often felt the same way in our own permaculture journeys so we are attempting to do our best to share information with as much clarity as possible. We appreciate the feedback. Cheers… Bill Wilson