Front Yard Rain Garden and Berm
- Bill Wilson
Picture history of our rain gardens.
In this blog post we discuss what a rain garden is and how we went about creating the water collection system in our front yard. We will touch on rain garden design, how they were dug and how the water flows through the system. Additionally, we explain which rain garden plants were selected along with the plants in the companion plant guilds.
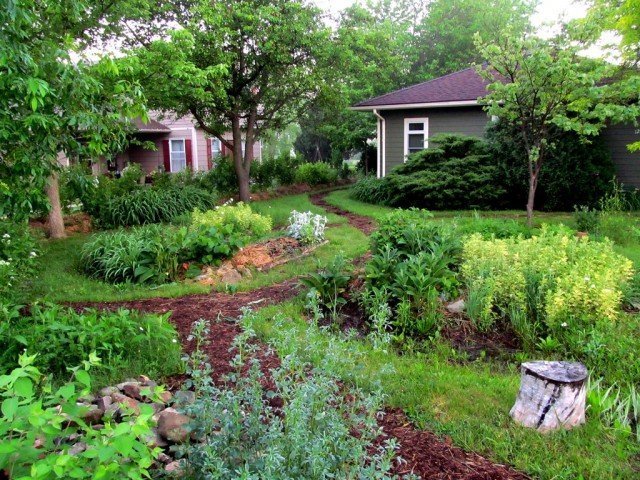
Above in our residence and the home of Midwest Permaculture in Stelle, IL as it looked in 2014. Below is what it looked like years earlier. Notice the juniper and arborvitae bushes in the front of the house for reference and comparison. We now have over 60 variety of useful/edible plants just in our front yard. We love it.

We thought you might like to see how it evolved to this point. Follow the picture summary below.
Enjoy… Bill and Becky Wilson
-Creating the Rain Gardens-
A Permaculture Ideal: Hold the water where it falls…
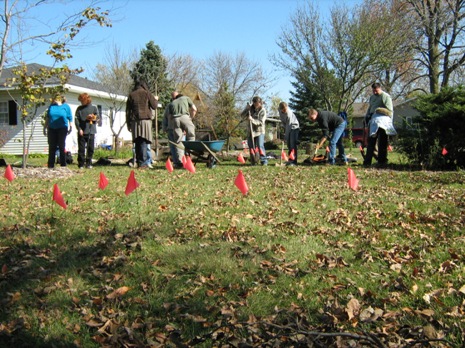
The first project we decided to undertake was the transformation of our front yard into a beautiful, but fully productive garden. We wanted to create something that looks good, feels even better to be in, while at the same time, producing food and herbs for our own consumption. Our first task: to find a way to hold the thousands of gallons of water that roll off our roof when it rains and find a way to hold it on the property.
The answer:
Rain gardens and swales.
Our students at our fall 2007 permaculture design course volunteered to help us do the digging. We marked out where we wanted our rain gardens to be with these little flags. A garden hose works too.
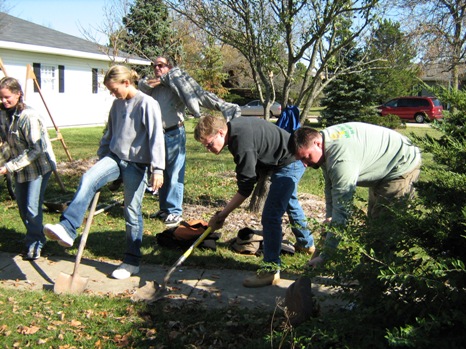
Every time we get an inch of rain, over 1,200 gallons of water comes off of our roof. When water flows down the drain spout it will now flow into three-shallow-retention ponds or ‘rain gardens’ by way of a swale or ditch, rather than just flowing off of our property.
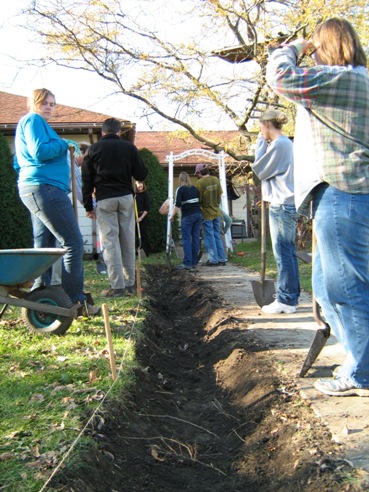
The purpose of the rain garden and swales is not to hold water year-round (although we could build them that way) but rather to hold the rainwater on our property just long enough until it has slowly soaked into the ground.
Doing so will allow us to store the water in the subsoil beneath our gardens for long periods of time. The excess storage capacity will significantly reduce our need to water or irrigate this garden area. Digging the main swale or ditch that takes the water directly from our down-spout.
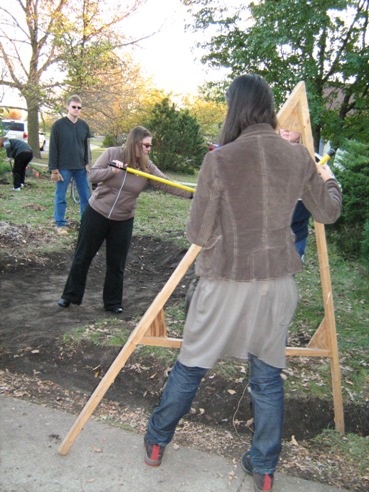
Our students learned to use a simply constructed ‘A’ frame to check the level of the swale and ponds.
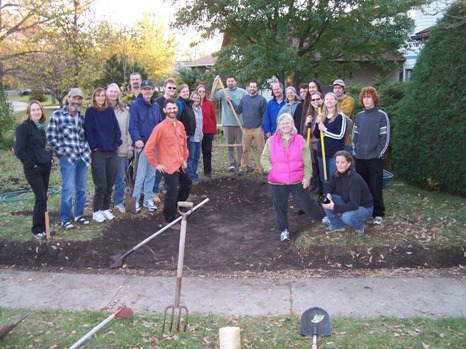
What would have taken me the better part of two days (and a sore back no doubt) was completed in 3 hours by the students from our October Permaculture Design Course.
In the permaculture world, when a bunch of folks get together to transform someone’s yard, this is called a ‘perma-blitz’.
-Many Thanks to all of our students.
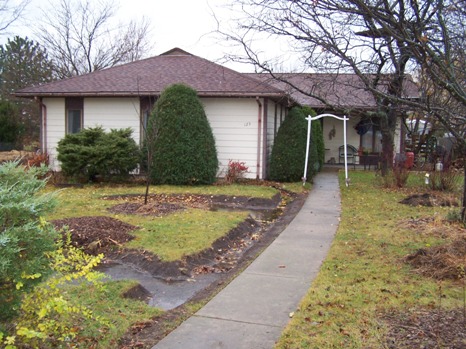
The first good rain following the digging of our rain gardens came about three weeks later. These next few pictures were taken early, however, it rained most of the day just about filling all three rain gardens to the top. I estimated that we collect over 1,400 gallons of water, all of it being held on our property. By the next morning (Thanksgiving) it had all soaked into the ground.
Simply constructed, these rain gardens will support our ability to grow vegetables, herbs and flowers for decades to come.
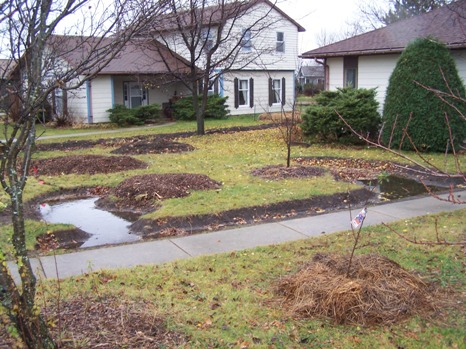
The mounds next to the impressions consist of the dirt we dug out which we have covered with a wood chip mulch.
The raised beds will give our garden some contour, making it a bit more interesting to the eye. They will also, as part of a permaculture design, diversify the micro-climates around the garden. The sides of the mounds facing the sun will be ideal places to raise sun loving plants, the back-side, cooler-moisture-loving plants.
The long dark strip to the rear is a berm made from the extra soil. It is a second catchment feature that will hold excess water on our property as the ponds overflow.
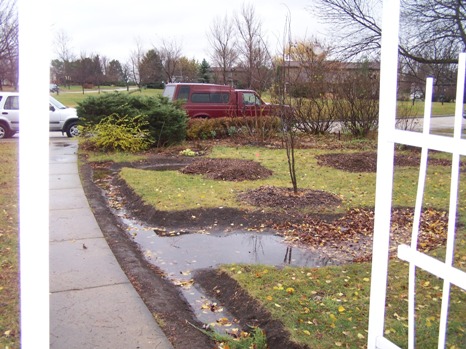
The mulch on the mounds will prevent erosion, hold down weeds in the spring, hold in moister, and provide organic matter (food) for the micro-organisms in the soil that build fertility.
The swale/ditch next to the sidewalk not only connects the rain garden ponds, it also helps to drain the water off of our sidewalk. It has slowly sunk into the ground over the years, collecting water and making it an ice hazard in the winter. That problem now seems to be solved as well. Another permaculture principle at work – “Stacking Functions”.
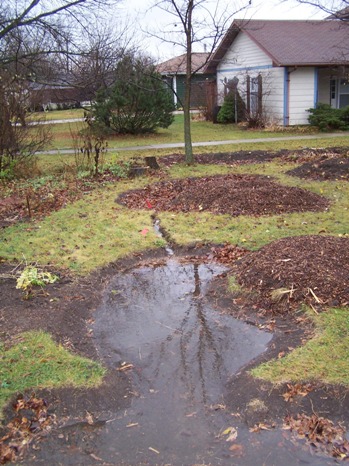
The narrow trench (center) connects pond #2 to pond #3. Water can be seen at the bottom of it. We raked the yard leaves into the back ‘pond’ already so it is hard to see it and the small amount of water it is holding. The leaves in the bottom of the pond/water gardens will minimize erosion over the winter while providing nutrients to the soils as they break down in the spring.
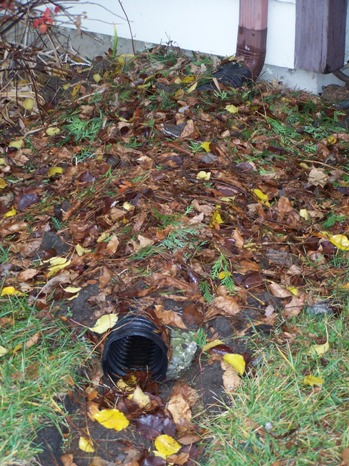
At the down-spout, we attached a 5-6 foot drainage tile and buried it slightly into the ground, the fresh dirt, now covered with leaves.
The drain tile disperses the downward pressure of the rushing rainwater thus minimizing erosion at the base and leading the water more-gently into the swale that feeds the ponds.
Becky and I want to thank all of our students from our August and October design courses for their great work and ideas.
This next set of pictures posted 1-24-08
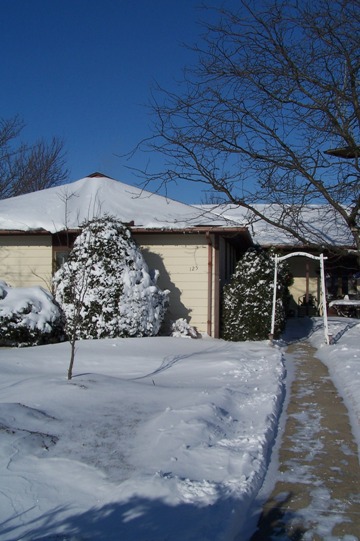
Well, we’ve had a couple of winter months to see how our ‘rain gardens’ perform with snow, freezing and thawing. So far, we have had three pretty good snowfalls this season and following each one, the same succession occurs in the gardens. First, the roof and yard fill with snow, almost eliminating any visible evidence of the rain gardens.
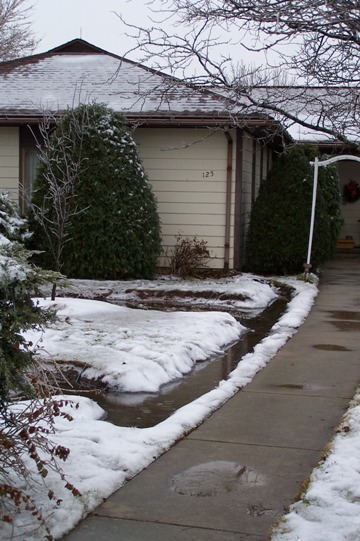
Then, it warms up and the snow begins to melt.
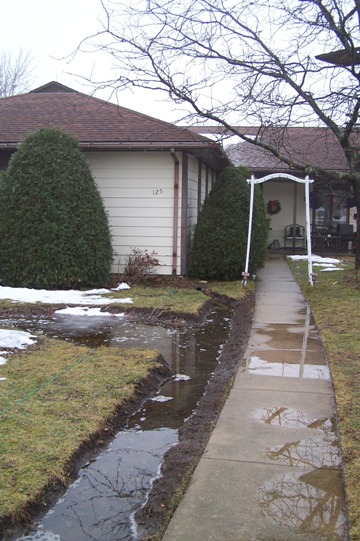
All the melting snow from the front half of our roof makes its way to the one gutter that feeds into our rain garden swale. From there it eventually fills all three of our rain gardens. The water now follows in a horseshoe shaped path around the entire front of our yard.

What is interesting however, rarely does the water make it all the way back to the side of the house. The rain gardens hold an estimated 1,400 gallons of rain water. They fill and drain with every rain or snow-melt, rarely overflowing.
I am guessing that 80% of the water that used to leave our front yard now stays on the property, charging the subsoil with moisture that we will be able to use all summer long.
Update (3-14-08)
Here is an email from Edie(subscriber to our emails from Connecticut)
who had some questions.
They were so good that I asked her if I could post them along with my reply…
Bill —
This is one thing I don’t understand: I can see the point of swales on a hillside such as in the excellent video you have here, where the swale catches water that otherwise would have headed down a hillside, and retains it in the soil. It’s a variation of traditional terracing methods. But you estimate that the swales in your rain garden catch 80% of the rain that normally would have left your property. Why do you think that the swales in your rain garden catch and absorb any more water than the grass cover that was there originally? The rain can’t roll off a flat yard, can it? And it’s not like the grass is an impermeable surface like a parking lot.
Also, if in fact the swale IS catching all that extra rain, aren’t you going to have water seepage problems in your basement from all that extra water retained in the soil? Again, the result of living on a flat savannah landscape and not on a hillside. Is it really appropriate for a flat suburban landscape?
This is really basic stuff, I know, but I can’t figure it out. I am eagerly awaiting the result of your experiment. I love the idea of rain gardens but these points are eluding me.
Thanks — Edie
This is my reply… 3-14-08
Good to hear from you Edie,
What great questions…! If you don’t mind Edith, I would like to post your questions right on our website along with my answers. If you have these questions, I bet there a many others who do as well.
Almost all surfaces have the ability to absorb some amount of water. A concrete parking lot for example might be able to absorb up to an inch of water over the course of two days if it comes as a mist over that amount of time. My yard might be able to absorb 1 inch of water over an hour period if it comes down evenly and the ground is really dry. However, if it rains cats & dogs giving me an inch of rainwater in 10 minutes, there is no way my lawn can absorb it fast enough, so the excess rain runs off my yard to the low spots between our neighbors homes, into the street, and into the storm drains. In a dense forest, this same inch of water in 10 minutes is no problem. The leaves and bark from the top of the trees and all way to the ground will absorb a tremendous amount of water (approximately an entire inch of rain) and then the ground litter and soil will absorb even more.
What the rain gardens, swale (ditch really), and berm do in my yard is to collect the excess rain water that would typically run off, holding it on my property until it has time to soak in slowly. The key here is the word ‘slowly’. With typical rains (and snow thaws) only a certain amount of water will penetrate into the subsoil while it is raining. Create a way to hold it on the landscape for awhile and you can store much greater quantities of water in the subsoil – much, much greater quantities.
Now, if I had a basement, then having excess moisture would be something to seriously consider, however, I have seen suburb home owners actually use swales and rain gardens to pull excess water away from their foundations but still soak the water into their lot away from their foundations. They claimed that it solved their wet basement problems. A basement can also be constructed to handle almost any amount of excess moisture and have it wicked away to a low spot where a sump pump will remove it to a drainage area.
All this being said, not all yards or landscapes can benefit from swales or rain gardens. Some property is already very low lying, even boggy and really needs some draining to increase its use and productivity. One again however, a permaculturist would take land like this, plant moisture loving trees and shrubs that will wick away excess moisture (harvesting multiple benefits from these trees and shrubs in some way), and contour their land with slightly tipped swales, raising some places and lowering others, which would allow excess moisture to more quickly drain away, while planting their edibles and other useful plants on the drier berms created by the swales.
The idea behind doing earthworks in permaculture is to create more ideal growing conditions from whatever you started with.
Does this make anymore sense Edith?
Warm Regards… Bill
And her response…
Thanks for your quick response! Yes, that helps! And please feel free to post this.
One thing, though — I don’t think we would want to depend on sump pumps to get rid of basement moisture — that’s using fossil fuel most likely, and we don’t want to do that. Better to have the land scheme organized to wick the moisture away from the houses foundations and toward a more useful spot.
I appreciate the personal response! It’s always great to hear from you and see what you are doing.
Best wishes,
Edie
Springtime Permaculture Transformation in our Front Yard
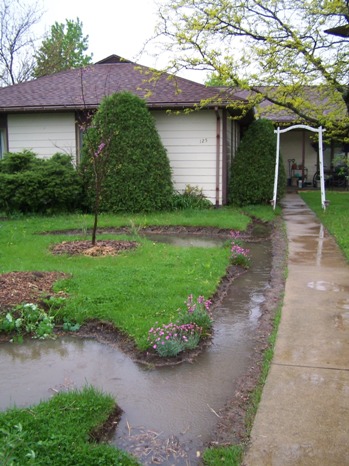
The big rains finally came in March and April which completely filled our permaculture rain gardens several times, causing them to overflow. Here you can see that both rain gardens #1 and #2 are full, as well as the connecting swale. The reason they are not completely filled is evident in the next photo.
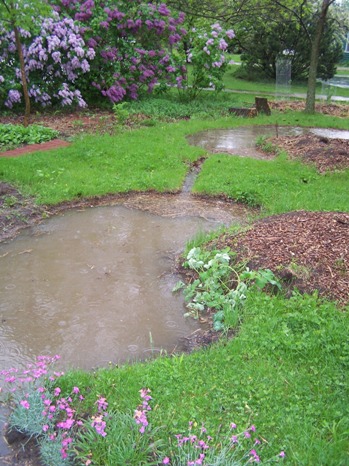
In the foreground is rain garden #2 connecting to rain garden #3 through the narrow ditch. As you can see, rain garden #3 is completely full, overflowing into the grass before it once again is harnessed by the berm we built along our property line. This is as high as the water will ever get in all three rain gardens for the water is perfectly level at this point and overflowing.
Bottom Line:
Whereas most of the rain water from our roof used to flow quickly off of our property from the gutters to the low spots on either side of our home, today, it now takes a horseshoe shaped path from our gutter, along the sidewalk to the front of our home, across the front from rain garden #2 to #3, and then flows into the berm as it returns toward the rear of our lot. We are capturing all of our rain water now, allowing it to soak slowly into the ground.
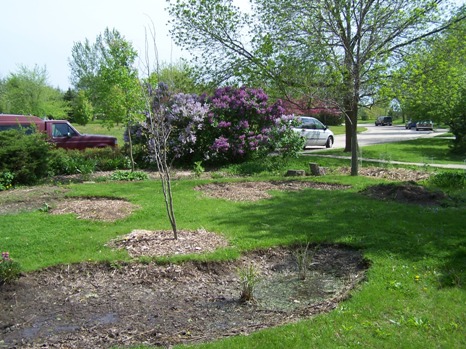
Spring was a bit slow to get here this year due to cooler than normal temperatures. The rain gardens however continued to fill (or partially fill) with each rain, and typically within two days, all the water would slowly soak in. You can see just a bit of water remaining in the bottom of rain garden #1 to the left.
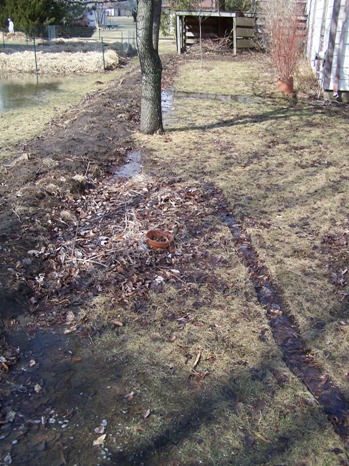
This is the berm which catches the overflow from rain garden #3. The excess water hits the berm and either soaks in or if there is enough, it works its way back toward our home and the rear of our property.
I thought you might like to see some progressive photos of its development. This photo was taken in late February following a thaw. The berm was built directly over our property line from the topsoil we removed by digging the rain gardens. The arrangement we made with our neighbors is that we would build the berm centered on our joint-property line so that half would be on our lot, and half on theirs.
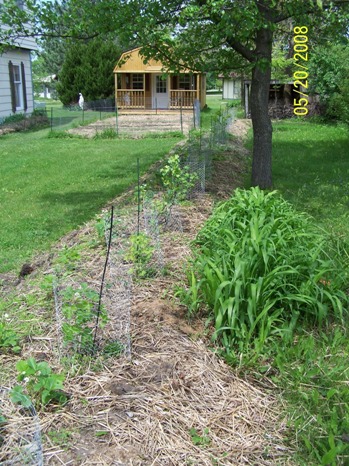
We also agreed that together we would plant gooseberries, currents and raspberries along the center and as the plants develop, care for and harvest our side of the berm. Here you can see that the berm has been mulched with straw after our neighbors covered the entire mound with some dried horse manure which they located and brought in. We now have a very deep and increasingly fertile soil within which to plant some perennial and annual crops.
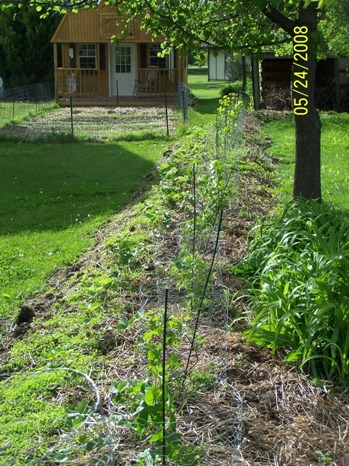
Here’s is the berm a bit later as it is beginning to green up.
What has been planted
thus far are:
Gooseberries
Currents
Raspberries
Strawberries
Green beans
Onion
Comfrey
and White clover
(As a cover crop, white clover fixes nitrogen, holds in moisture and helps block out weeds.) All are perennials (except for the beans and onions) and will produce year after year. With all of these plants and the clover there is little room left for weeds so we have also minimized the work to maintain the area.
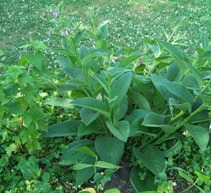
Comfrey
(There is a young currant plant to the immediate left of the comfrey)
FYI …Comfrey is a favorite plant of many permaculturists
for its multiple benefits.
(As quoted from Wikipedia)
” Comfrey is a particularly valuable source of fertility to the organic gardener. It is very deep rooted and acts as a dynamic accumulator, mining a host of nutrients from the soil. These are then made available through its fast growing leaves (up to 4-5 pounds per plant per cut) which, lacking fibre, quickly break down to a thick black liquid. There is also no risk of nitrogen robbery when comfrey is dug into the soil as the C:N ratio of the leaves is lower than that of well-rotted compost. Comfrey is an excellent source of potassium, an essential plant nutrient needed for flower, seeds and fruit production. Its leaves contain 2-3 times more potassium than farmyard manure, mined from deep in the subsoil, tapping into reserves that would not normally be available to plants.”
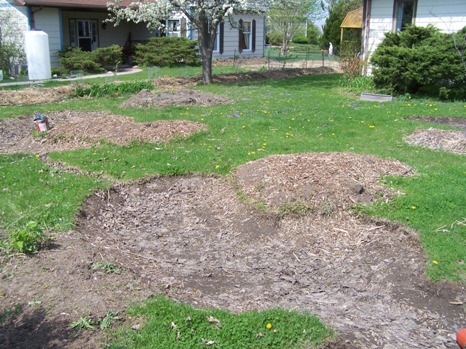
As spring pulled us outside we were feeling the pressure to start planting around our newly dug permaculture rain gardens and to do so ‘by the book’ as a demonstration site for others to learn from. We knew there would be some interest in what we did and how we did it. Feeling the pressure to ‘do it right’ we did research on plants and plant guilds and came up with list upon list of possible plant combinations. Personally, we were also very busy in our work and family lives.
The truth be known: We became paralyzed with too many options. We didn’t really know where or how to begin to ‘do it right’.
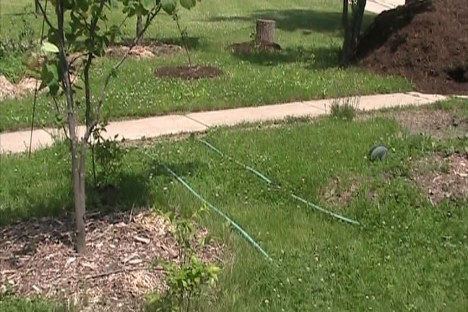
So, we began anyway. We decided that we would just do our best, do what we knew how to do, experiment a bunch, and begin to lay out our yard into likely areas of interest and production by putting in a path system.
If we were going to eventually minimize our lawn and develop permaculturally designed beds, we would need a way to navigate the yard with a wheelbarrow and tools. So we laid out the paths with the use of garden hose and rope and began to remove the sod.
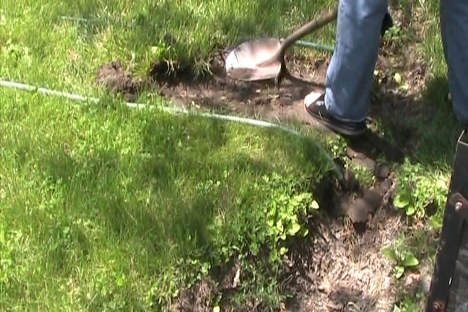
Removing the sod was something we decided to do for several reasons but just so you know, it is not necessary to remove the sod in order to create paths. One can simply lay down cardboard or 4-5 sheets of newspaper and cover it with mulch.
Presto! You have instant paths
We chose to remove the sod down to 2-3 inches so that we could harvest the topsoil to build up a berm in our back yard. Why bury perfectly good topsoil beneath a path when we could be growing more plants in it instead.
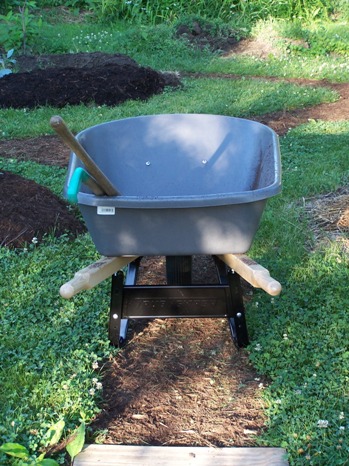
After the sod was removed we backfilled it with a hardwood-shredded mulch. We selected and purchased a full truckload of this material because of its ability to take a good pounding from the rain without dispersing (chipped wood erodes more easily but is still a good option) and because it is fluffier and airy, it allows the rains and oxygen in while still holding down weeds and reducing moisture loss.
The hardwood mulch also breaks down relatively slowly creating an ideal environment for soil microorganisms which in tern, feed the plants. We also used this mulch all over the yard on newly made and established garden beds and around our young and established fruit trees.
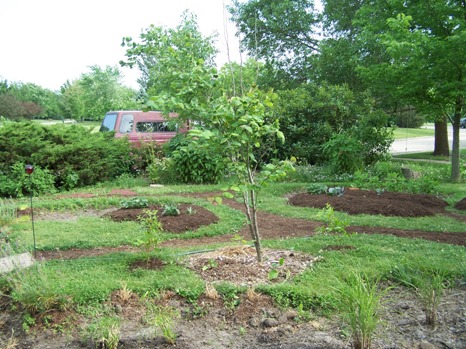
Slowly the yard begins to take shape as the paths and beds are created. Becky kept her eyes open for stray and extra plants around the community and we purchased some as well. The main criteria for selecting plants was that they should be mostly perennials, edible or good for the soil, and relatively easily available.
The plants that go into the bottom of the rain gardens would have to be water/flood tolerant as well as able to withstand some very dry periods. Native prairie plants fit this bill.
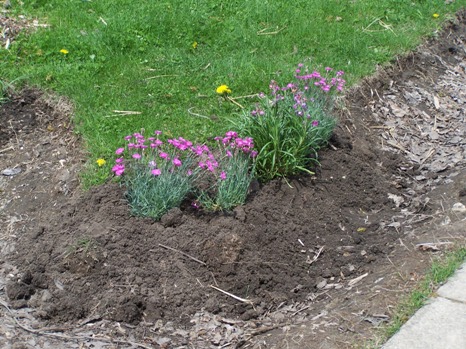
Along the edges of the rain gardens and connecting ditch, Becky planted a few flowering plants for color. Planting on the edges gives them access to plenty of moisture without drowning them when the area is filled with water.
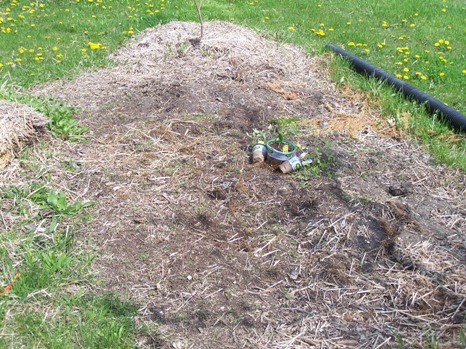
In this area of our front yard (opposite the sidewalk from the rain gardens) where we have several fruit trees planted, there was a barren spot where last year we had stacked up some straw bales for mulch.
On either end of this bare but now fertile patch (the biological activity exploded under the rotting straw) are a young apple tree and a 6-year old peach tree. The ground was ready for planting so Becky just started putting things in.
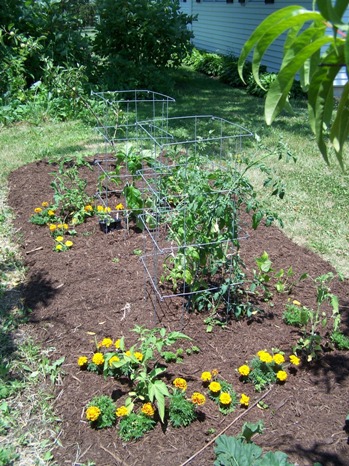
Here is the same spot 6-weeks later. A few leaves of the peach tree are visible in the upper-right-hand corner of the picture.
In this bed there are now:
Tomato plants
Peppers
Marigolds
Rhubarb
Parsley
Basil
and Bush green-beans.
Lambsquarter and purslane showed up on their own (as they usually do in our open soils) which we chose not to ‘weed out’ but rather ‘pick out’ and add to our salads for flavor, color and nutritional benefits. There are 11 edible plants in this guild If you add in the apple and the peach trees. The bed has been covered now with the shredded wood mulch to hold in moisture and continue to add organic matter to the soil.
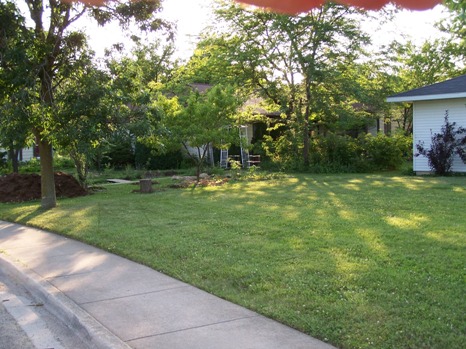
As a comparison, this is our yard (in the background) as viewed from our neighbors traditional lawn and yard. Our yard looked just like this several years ago.
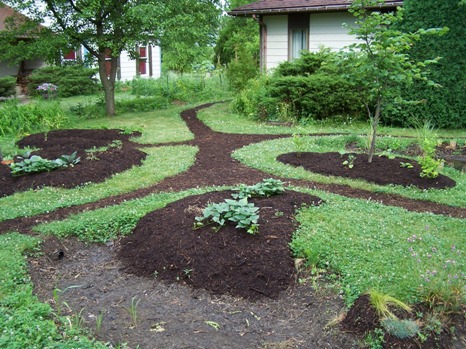
Here it is as of July 2nd, 2008, with the rain gardens, the mulched beds and paths, and the planted berm near the rear. Those are sweet potato and cabbage in the beds. The total cost for plants this spring was about $150. Digging the rain gardens and paths didn’t really cost a thing. If you count up all the labor of our students and ourselves I estimate it comes to 24 hours of digging. Our biggest expense was the shredded hardwood mulch which we saw as an important investment in soil building, water retention, labor saving (fewer weeds to pull) and overall aesthetics.
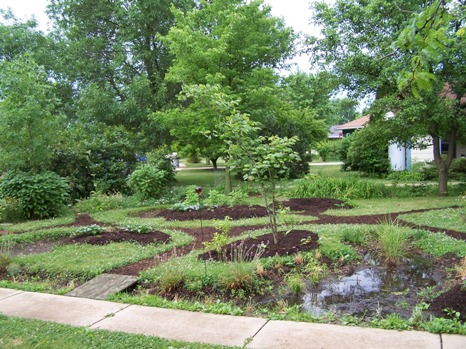
It is a priority of ours that if we are going to turn our front yard into a food production area, we also want it to look nice and be inviting for ourselves and our neighbors. The cost for a truck-load of mulch was $325.
That’s it for this posting.
Bill & Becky Wilson
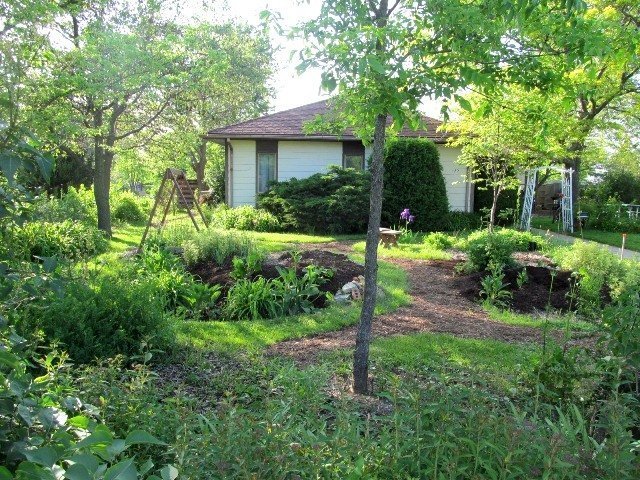
Filling in…Summer 2012 – We love spending time in our front yard. There are 53 species of edible or useful plants now. There used to only be three….tree, grass and bush.
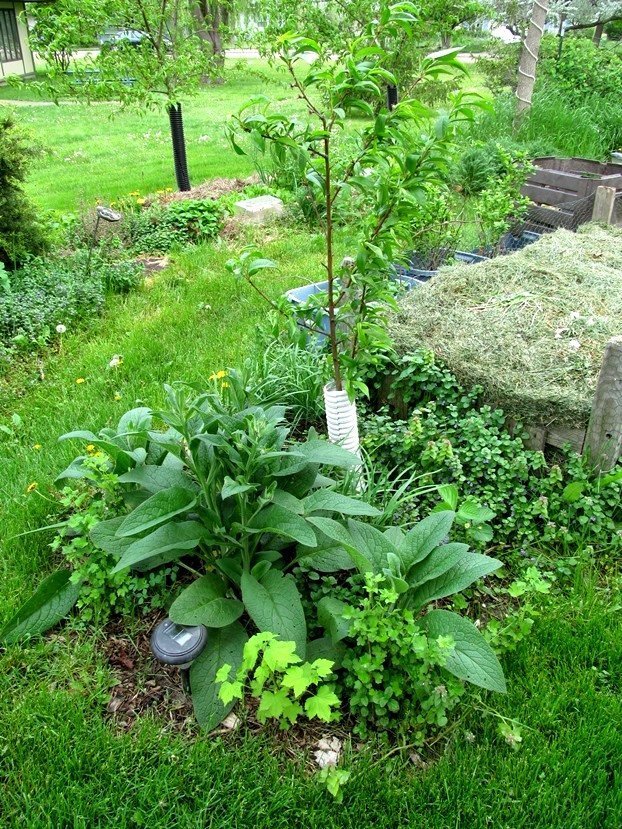
EXAMPLE OF PLANT GUILD – A 1-year old guild planted around one of our young peach trees includes comfrey, gooseberry, currant, mint, strawberry, clover, garlic chives – volunteer dandelion and creeping charlie (kept as nutrient accumulator and groundcovers–chopped and dropped occasionally). The comfrey is ready to be cut back so it won’t take up all of the sun. The guild is positioned next to one of our compost piles which naturally provides nutrients.

9 thoughts on “Front Yard Rain Garden and Berm”
Hi,
Your garden is wonderful! Seeing the photos have really helped me understand the purpose of a swale. Do you recommend digging the swales and rain gardens in the Fall and then planting in the Spring? Would I be able to set the swale in the Spring and plant right away?
Cristin
Hi Cristin.
I think it is ok to dig the rain gardens and swales anytime that it is not too muddy. They will continue to work with or without the plants but many herbs, grasses and shrubs can be planted throughout the year and most will take.
I say go for it…and have a great time.
Bill
Hello Bill, I just recently came across this post and I am so happy that I did! Your front yard is beautiful and so functional, I love it! I am curious about the major ground cover you have..When you first bought the property it looks like the front yard was predominantly dry lawn. In the years that follow this space transitions to a healthy lush green! It does however look like you maybe seeded clover into the lawn, as it does not look like just grass from your photos? Also do you find this design easy to traverse with a lawn mower? At what point did you find that you no longer had to water your garden beds (or do you still have to supplement some water?)
Thank you!
Gen
Hi Gen…
We have not seeded anything into the lawn. We had some dutch-white clover already there and at different times of year it flourishes and at other times, the grasses seem to dominate more. There are also some violets and of course dandelion and plantain.
We’ll still run a powered lawnmower around several times a year when the grass is growing like crazy and use the grass catcher to harvest it for the compost pile. But otherwise we have a battery powered weed-whip that we’ll swing around from time to time to touch things up as needed.
We no long really think about watering any of our perennial trees and shrubs. The roots are down and the water is there but if we have a full water tank (425 gals.) and a rain is on the way we might drain the entire amount around the drip-line of one or two of our fruit trees, especially if they are filling out fruit.
Most of our annual crops (tomato, pepper, brassicas, etc.) we need to pay attention to and water if/when needed. Their roots are closer to the surface and thus susceptible to drying out but where we are using mulch the amount of watering we do is fairly minimal.
Best of luck Gen… Cheers
Thank you SO much for this post. It was instrumental in me understanding how to go about making swales and berms. I only have seen the after photos and never really understood the process. Now I feel comfortable taking this on.
Hi,
enjoyed your post!
Can you tell me what mix of soil/material is being used for the actual planting area of the garden?
Thank you!
Sorry Debbie. Never saw this. All we did was add in some of our compost from the bottom of our cold compost pile along with a some worm castings from our worm tower. Do a search on our site for worm tower to learn more about that if you wish.
This year we are going to experiment with foliar sprays of compost tea mixed with trace minerals.
Hi, your peach tree plant guild looks awesome! I have one question….how do you keep grass and weeds from taking over the bed where you have the mulch? I live in South Florida and started a permaculture garden in our backyard. Our biggest problem is weeds and grass taking over the beds.
We just don’t have that problem Jen now that the bed is established. We did some weeding at first but now with the mint and comfrey they create too dense of a cover and shade out any other ‘invaders’. Hope this helps…. Bill