Epic Greenhouse Rocket-Mass Heater
- Bill Wilson
This is an April 2016 Blog Post on how we built a Thermal Mass Rocket Stove at Jordan Rubin's 'Heal the Planet Farm'.
We call it the Epic Greenhouse Rocket-Mass Heater because of it’s sheer size and multiple modifications we designed into it. The whole stove is built around an 8″ flue system that exits outside of the greenhouse below floor level, under the greenhouse end-wall, and then turns towards the sky.
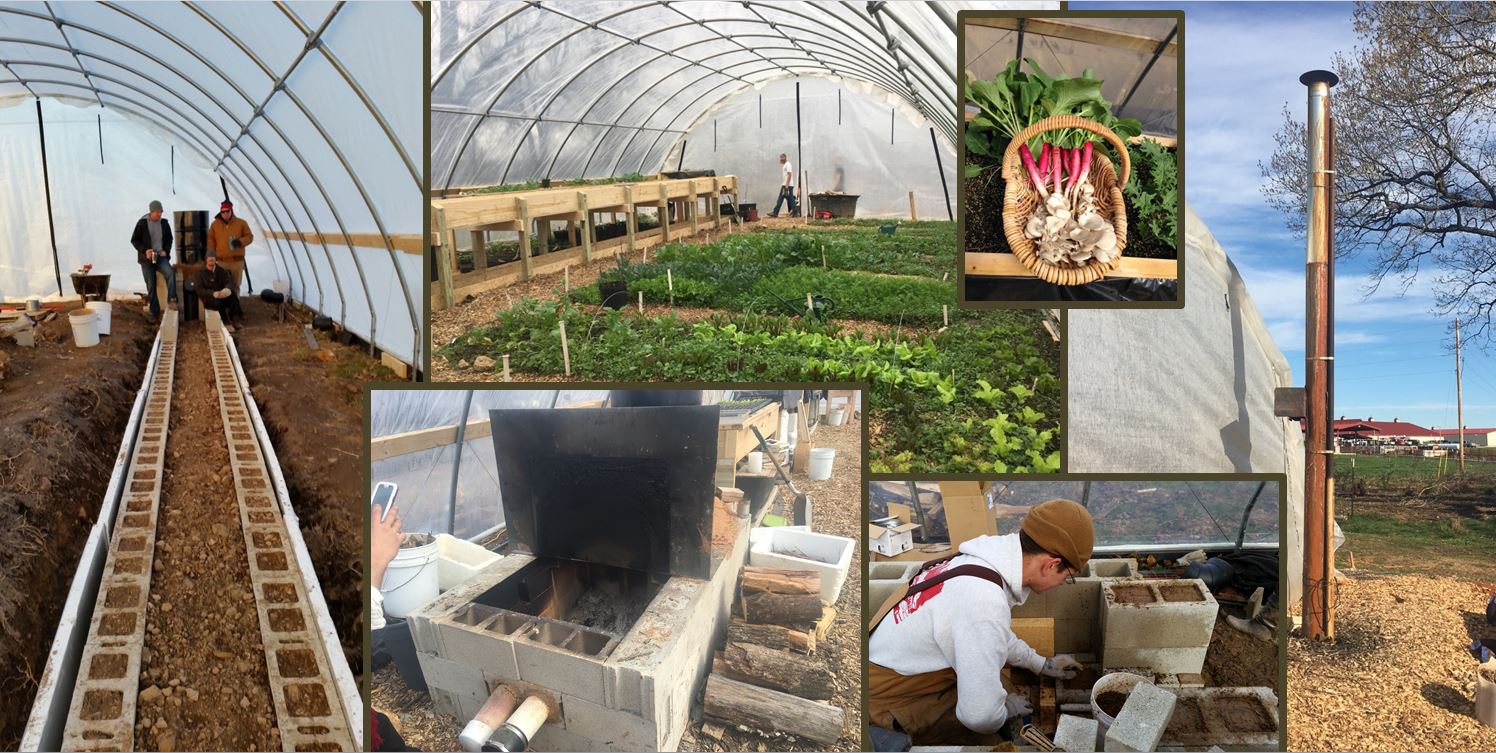
The key modifications we made to this stove that are not usually found on more traditional rocket mass heaters are:
- The feed chamber is very large capable of holding full-sized firewood logs so it can be loaded to burn for up to 4 hours at a time and produce a lot of heat.
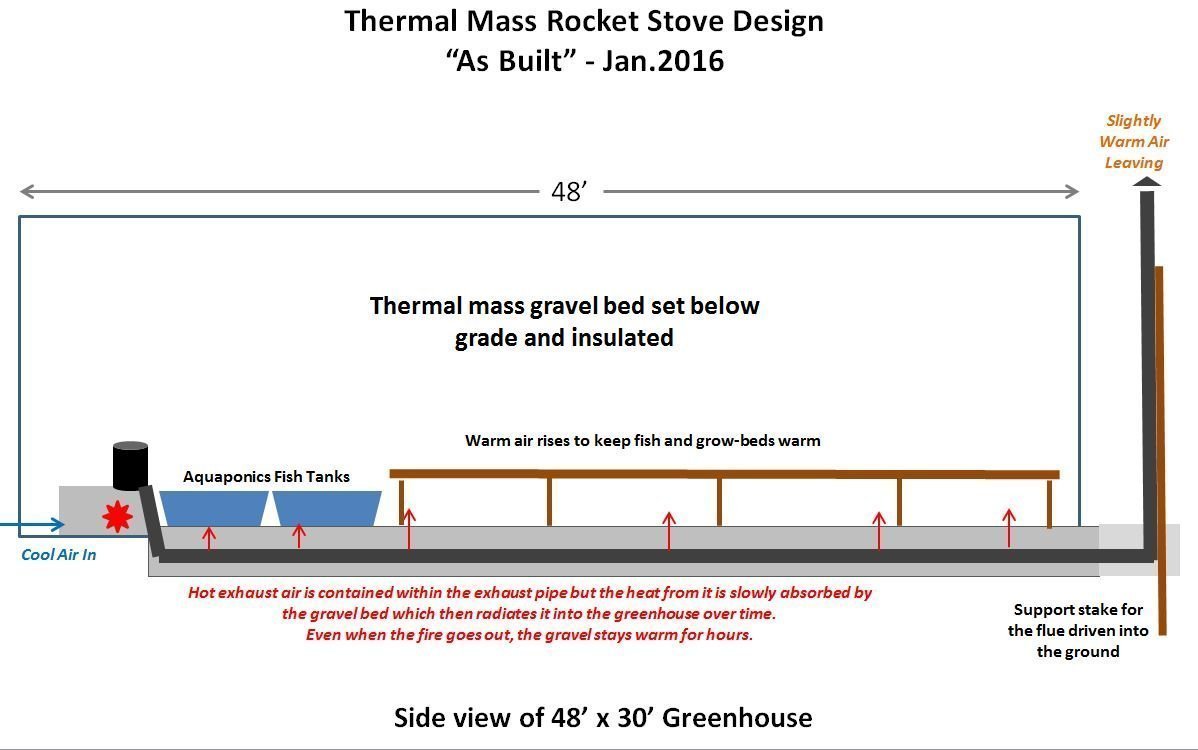
- The thermal battery or thermal mass is below grade and insulated so the heat will not wick into the soil surrounding it but instead radiate up to keep fish (aquaponics system) and bedding plants warm even in the dead of winter.
- We installed a multiple-speed flue fan and a flue damper near the end of the exhaust pipe to give ourselves greater control over the speed of the exhaust and even the burn. We can slow the exhaust down to hold the heat in the thermal mass longer when it’s hot or speed it up when we need a stronger pull to get it started. We know this is unorthodox and a bit like cheating, but it’s very helpful and the fan is variable speed using very little electricity.
Continue to slowly scroll down to view over 40 pictures of the actual build & workings of the stove
…or…
Click here for our conclusions at the bottom of the page.
Why should you build a rocket stove?
When is it appropriate to build a rocket stove?
We cover the why and when of rocket stove building in our Permaculture Design Certificate (PDC) courses.
Sample the Course!

Enter your email address to receive access. By signing up, you'll receive occasional email newsletters with valuable permaculture insights and updates on our courses. We respect your privacy and won't send spam. You can unsubscribe at any time.
Picture Summary of the building of a Greenhouse Rocket-Mass Heater Build and its use from January-March of 2016
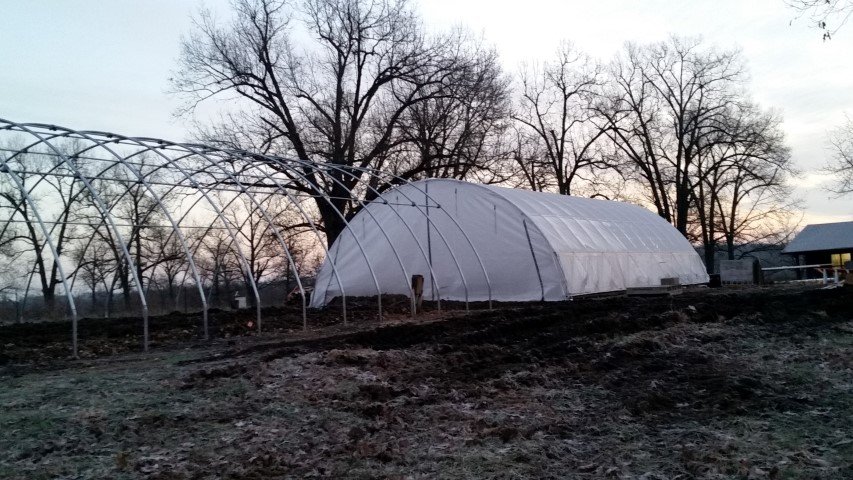
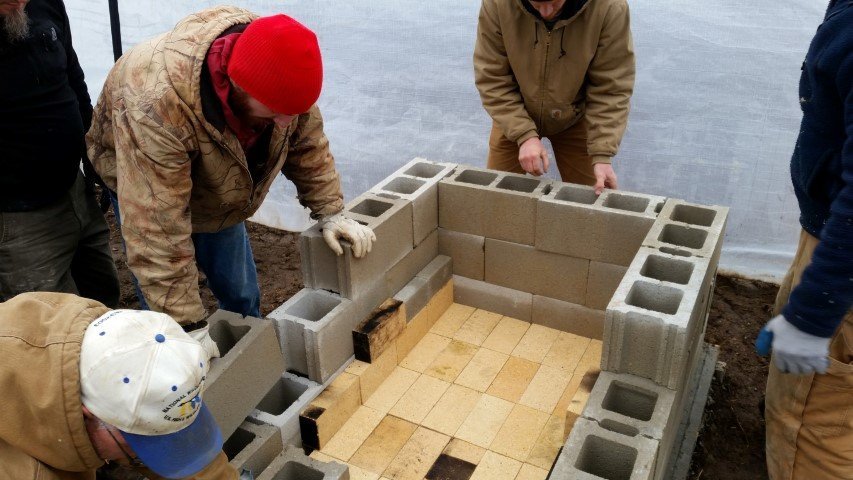
Kevin and the farm-design team had poured a 4′ by 6′ concrete pad for us to build upon. The first step was to dry-brick the stove together to get a feel for how it all might fit. It didn’t take long before we had our basic design.
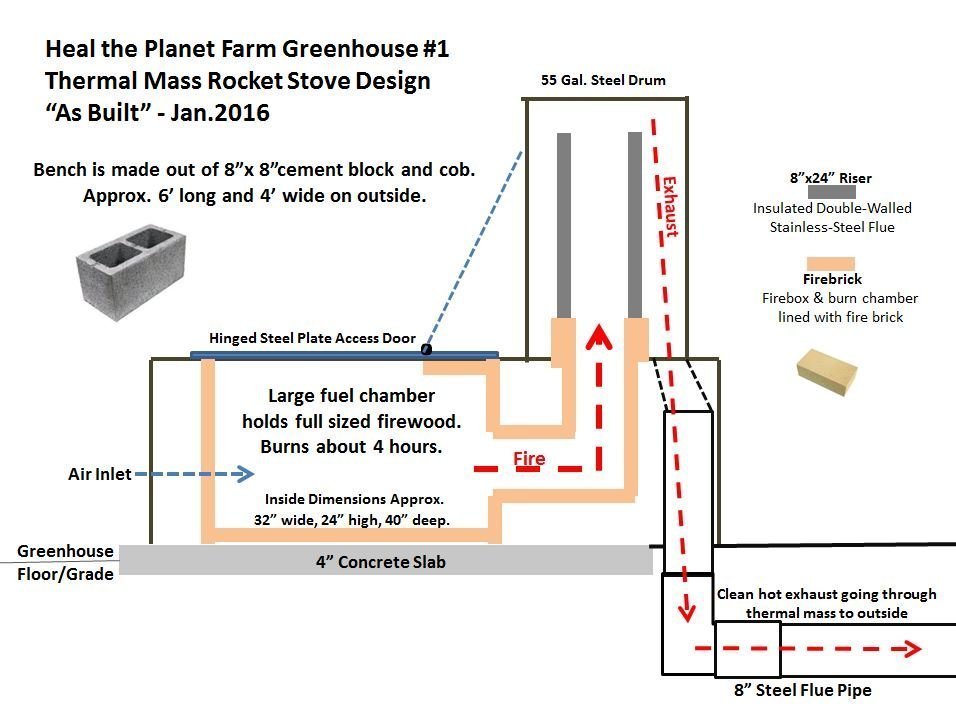
Here are two Sketches of the Basic Design
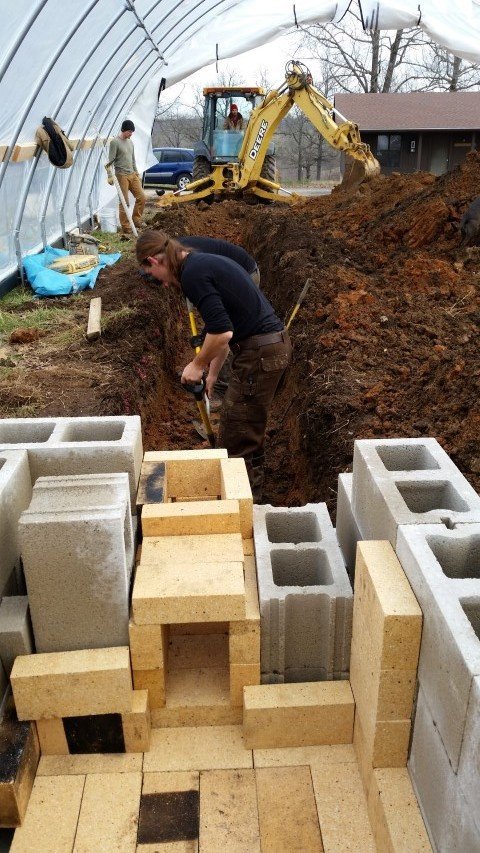
While we started to form the fire chamber, other members of the team began to dig the trench which was to become the thermal mass sink. The backhoe saved us about 20 hours of digging.
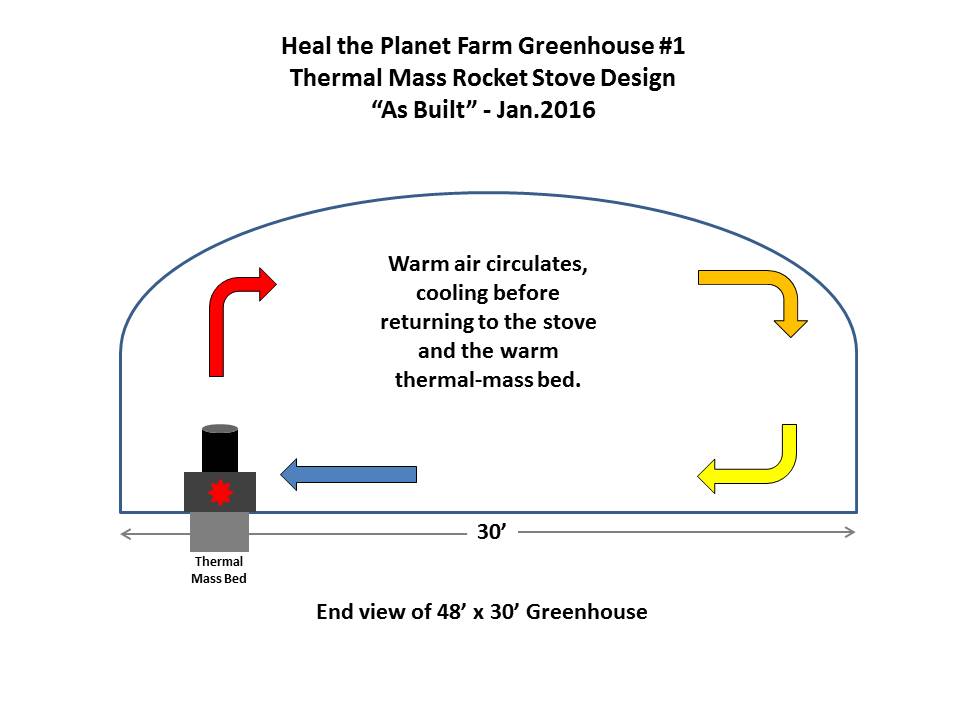
Located near the north wall, the heat rises, rolls across the top, drops as it cools across the south face of the greenhouse and moves gently across the floor to be heated once again by the stove and thermal-mass trench.
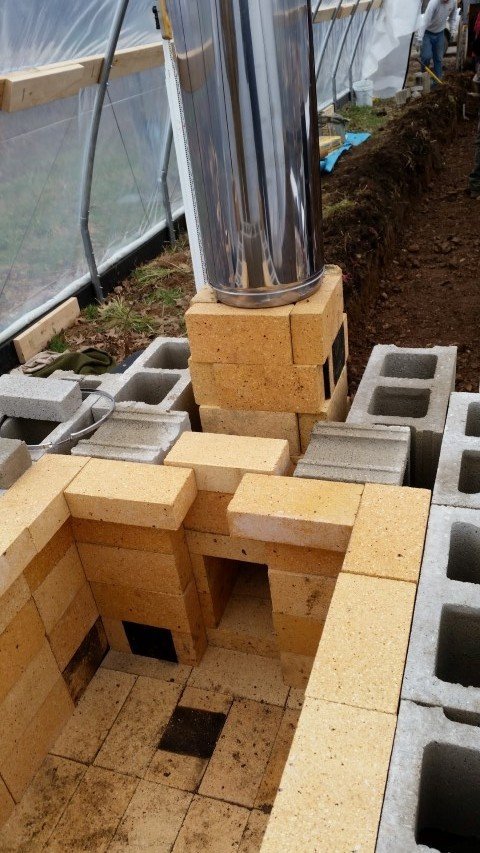
The fire chamber takes shape and the double-walled, insulated, stainless-steel riser is set into position.
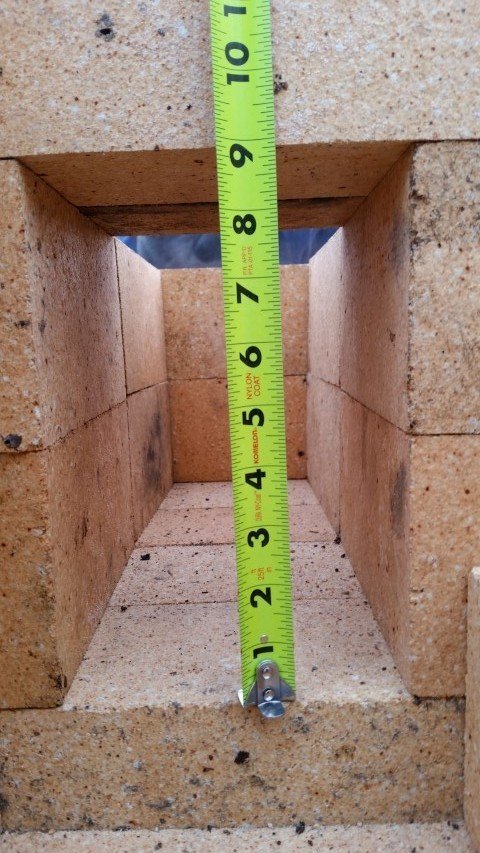
The opening to the fire chamber is just under 6″ and 9″. It is the same sized opening as an 8″ circular flue pipe. The idea is to maintain this 50 square-inch opening throughout the entire stove.
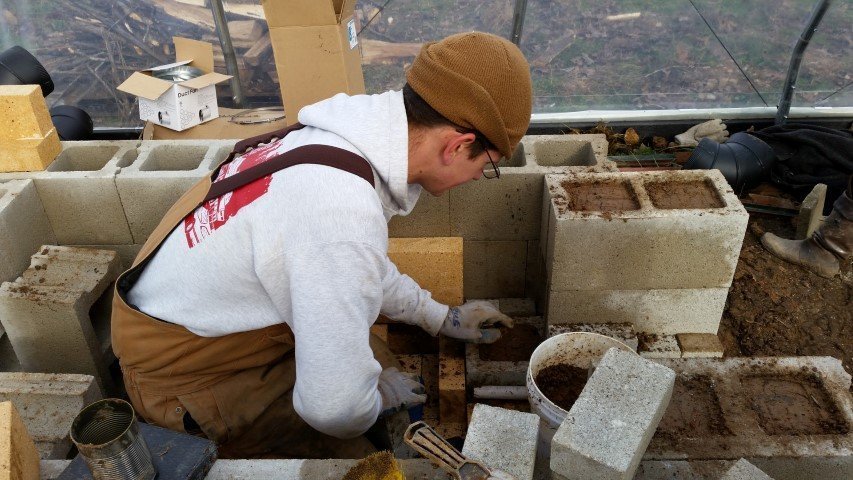
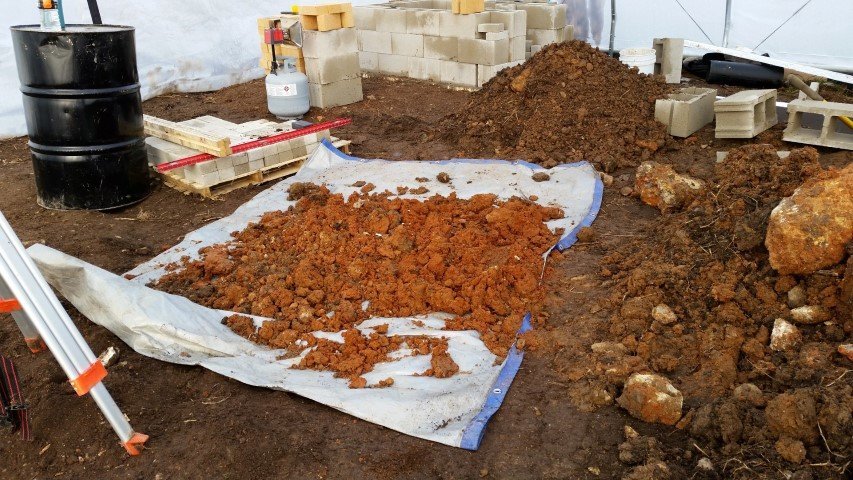
While digging the trench we came across a good seam of clay, perfect for making cob.
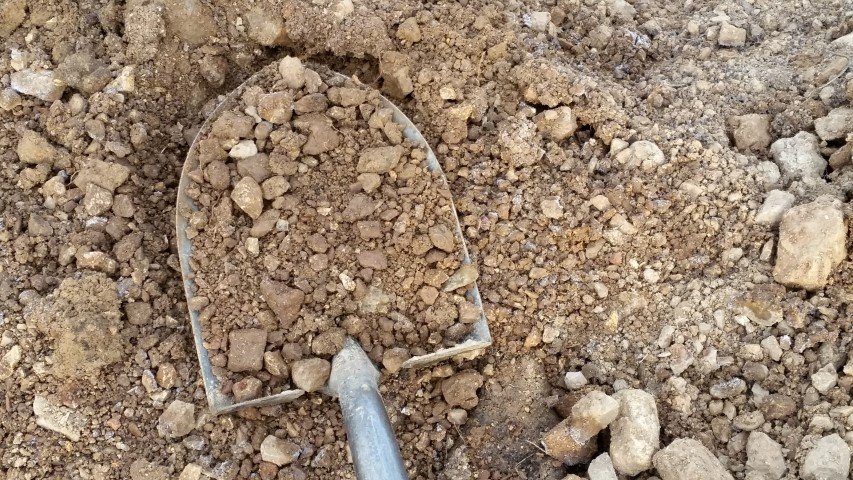
Also on the farm there is an area near the river that naturally provides this gravelly mixture. It is an aggregate of 1-2 inch stones all the way down to some sand and even clay particles. Since we are not doing any finishing cob work this mixture will work well for the rough work we do have. All we had to do was hand pick the larger stones out.
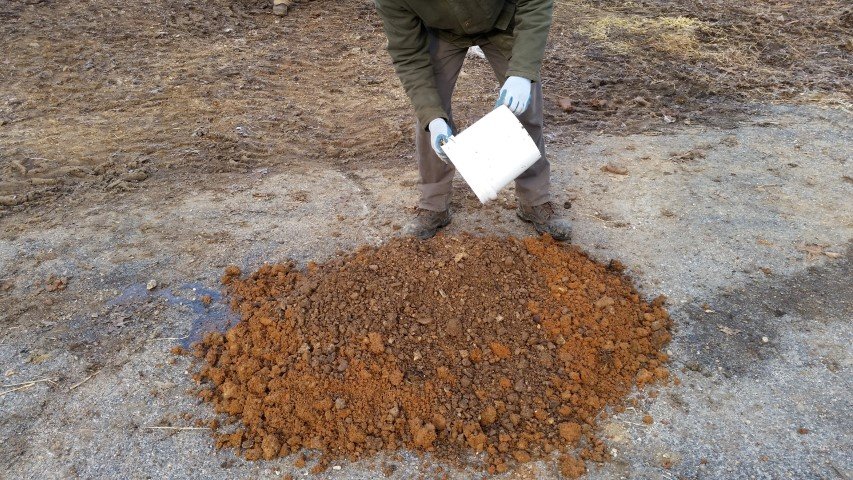
To make a quick cob, we pulled out a small pile of clay, covered it with the gravel mixture and some water…
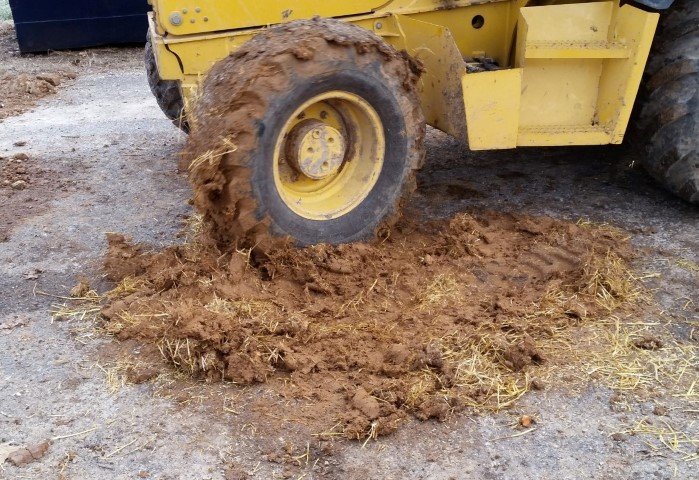
…and then ran back and forth over it with the tractor to mix it. Some straw was the last item we added.
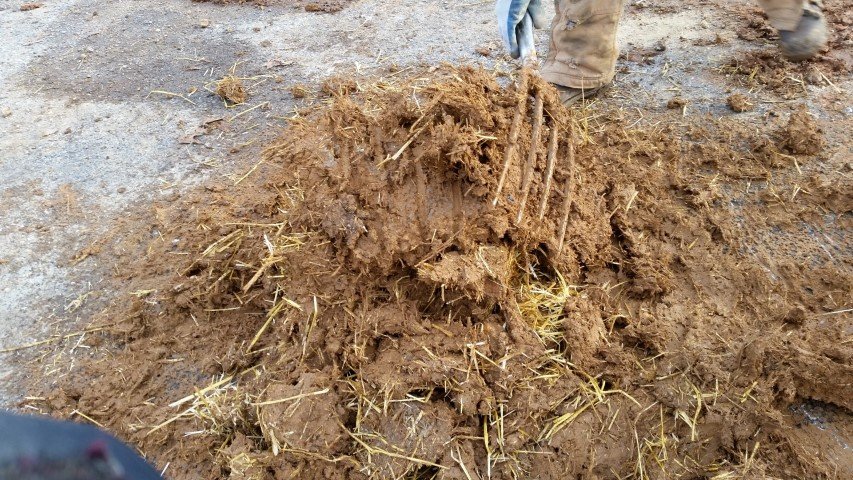
The shovel crew re-piled the mixture several times for the tractor to get the consistency right.
Here is a 45 second video of how effectively this large tractor mixes the cob.
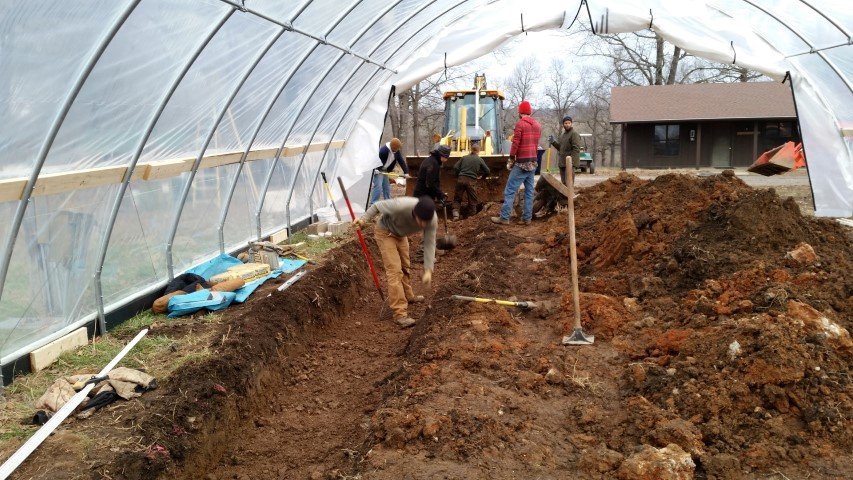
Back to the trench. It has been fully dug and now the river gravel is being shoved out of the bucket of the backhoe and layered 3-4 inches thick at the bottom. The thermal mass is built up from this.
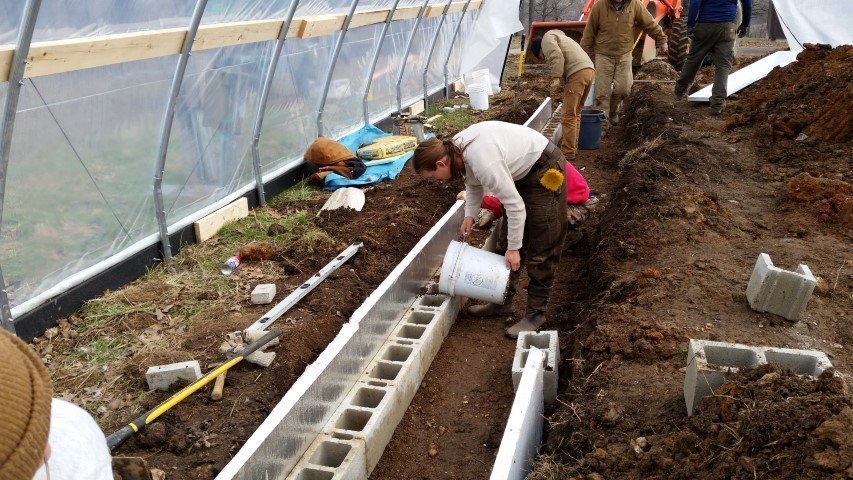
One side of the 8″x 8″x 16″ concrete bricks are laid end-to- end against the insulated wall and then filled in with gravel to hold them in place and increase the thermal mass.
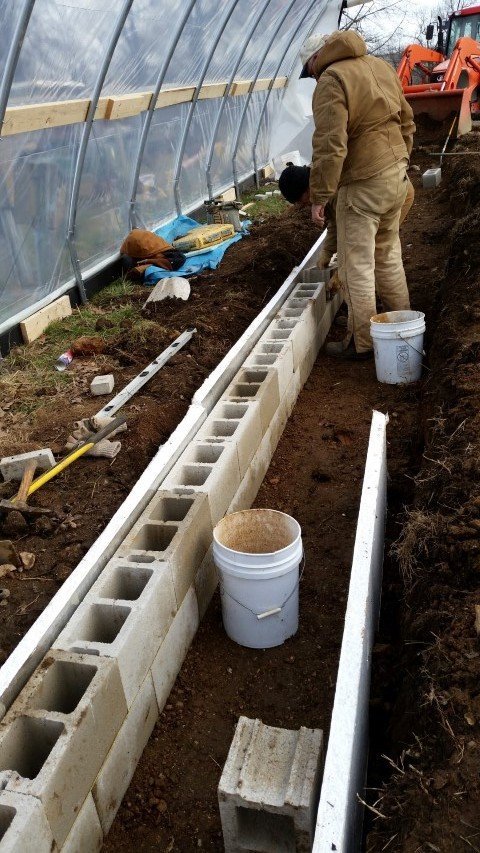
Then, a second layer of bricks is added.
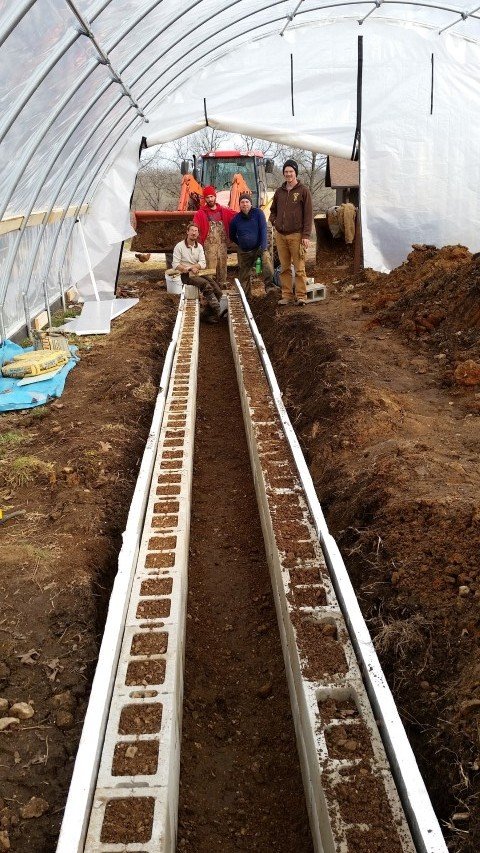
The other side is done the same way with gravel filling in the bricks. Next goes the insulation on the bottom between the rows, then 3-4 inches of gravel, then the 8″ exhaust flue, then more gravel and a third row of bricks.
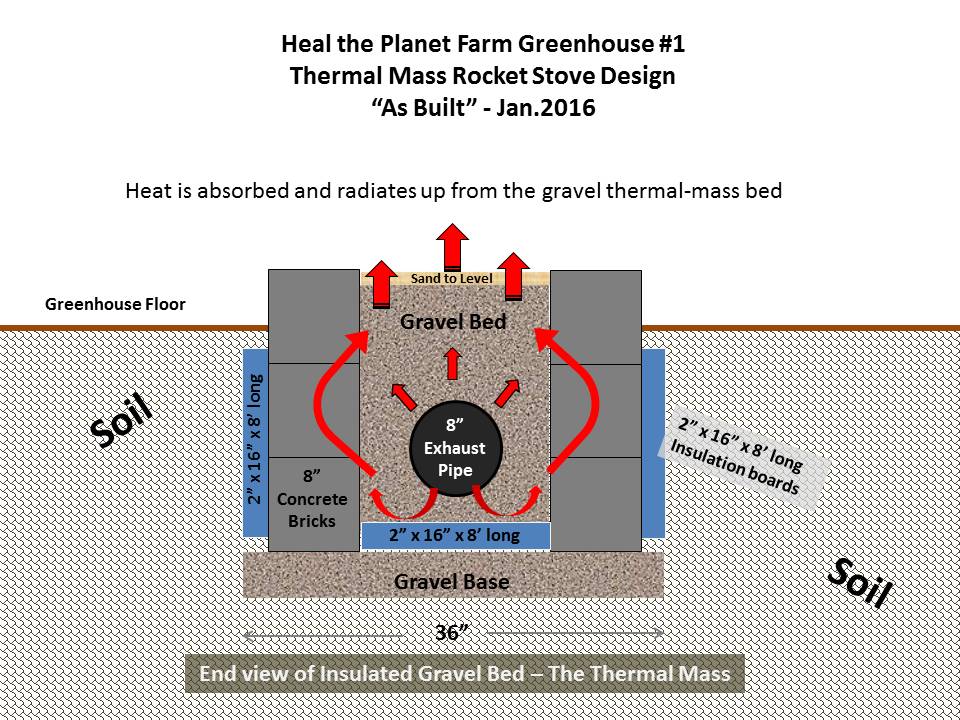
Here is a cross-section of how the thermal-mass trench is constructed.
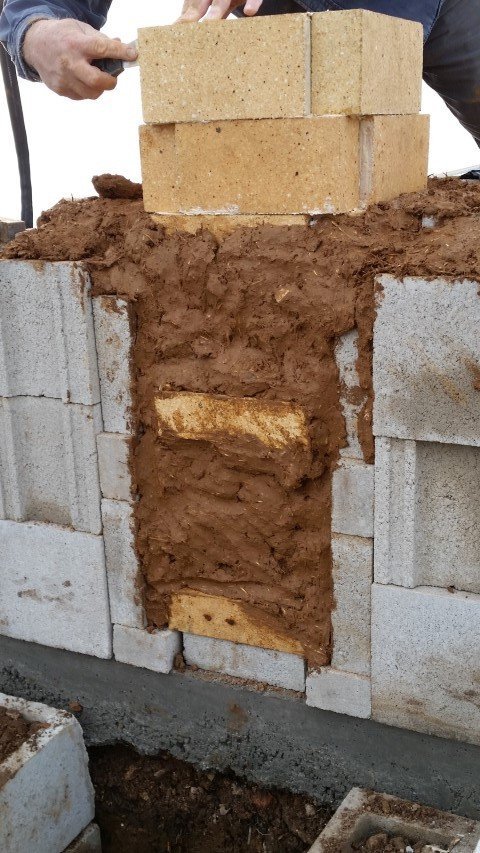
This is the back of the stove with all of the firebrick cobbed together with the cement block to form a single mass. Notice the cement slab the stove is resting on and the cement bricks forming the trench.
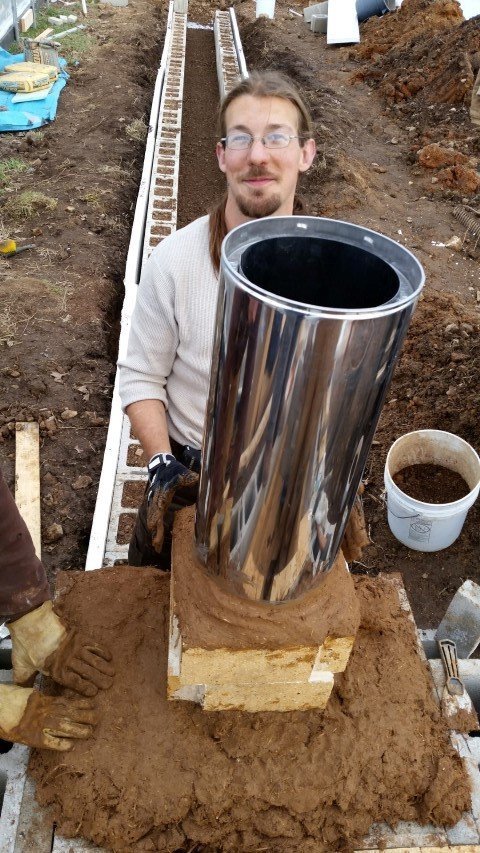
Jim (a 1-year work/study permaculture designer at the farm) has cobbed the riser to the fire chamber while another pair of hands lays down the base for the 55-gallon drum to sit upon.
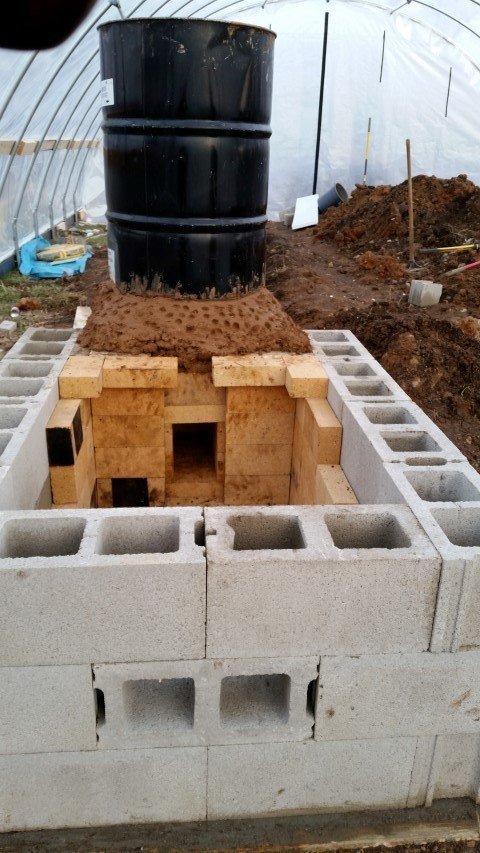
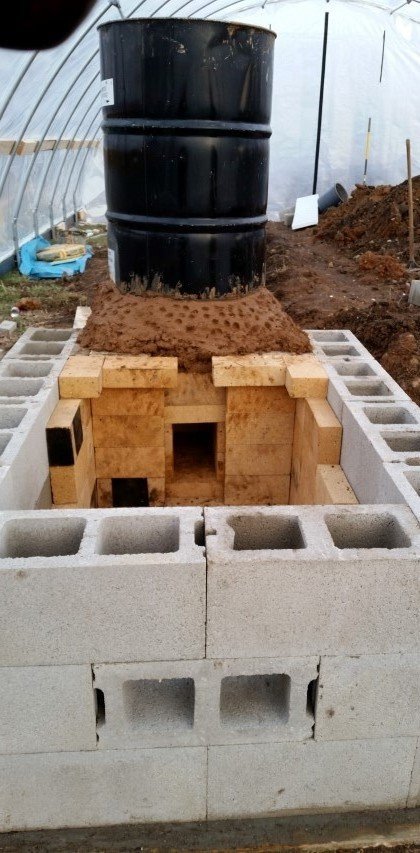
The radiant barrel is nestled into the cob on top for its first seating. You can also see how the firebrick has been laid out in the stove to protect the feed chamber and create the opening to the fire chamber because concrete brick cannot withstand the high temperatures generated in these stoves. On the front face of the fuel box one brick was turned to make the opening for the fresh-air intake.
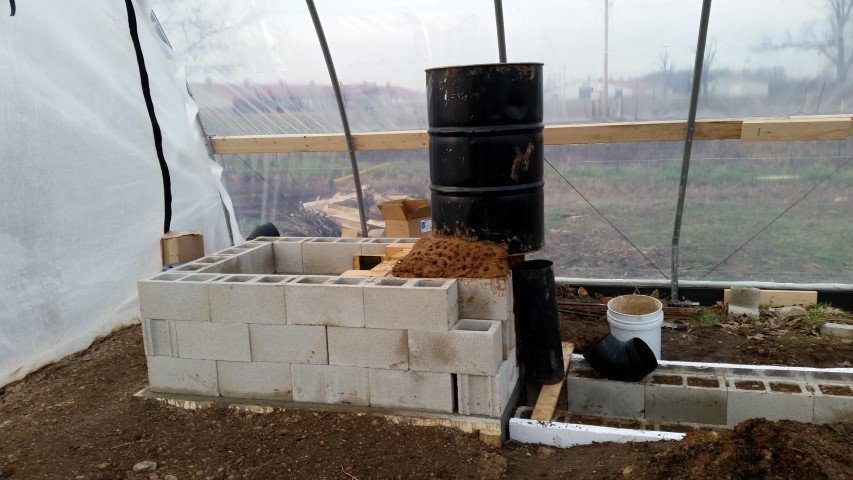
With the radiant barrel in place you can begin to see where the exhaust flue will mesh. The barrel extends a bit beyond the concrete slab foundation to accommodate this.
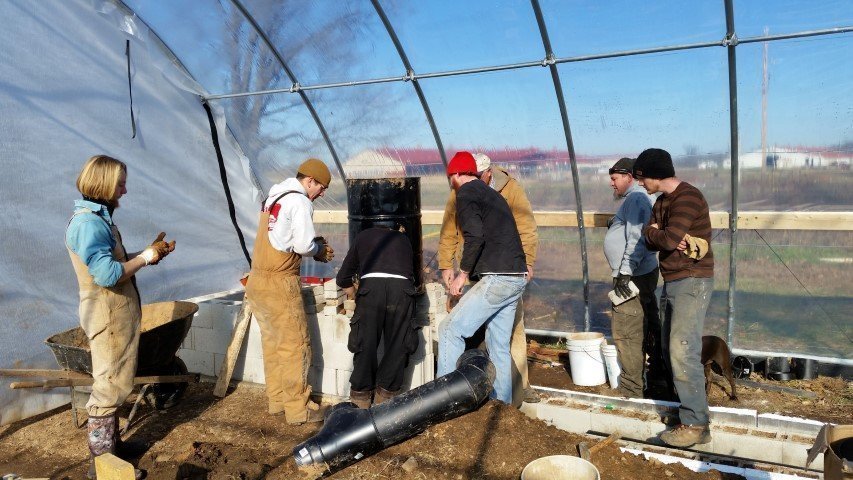
The next morning the team assembles to design the exhaust system that will connect the barrel to the underground exhaust pipe.
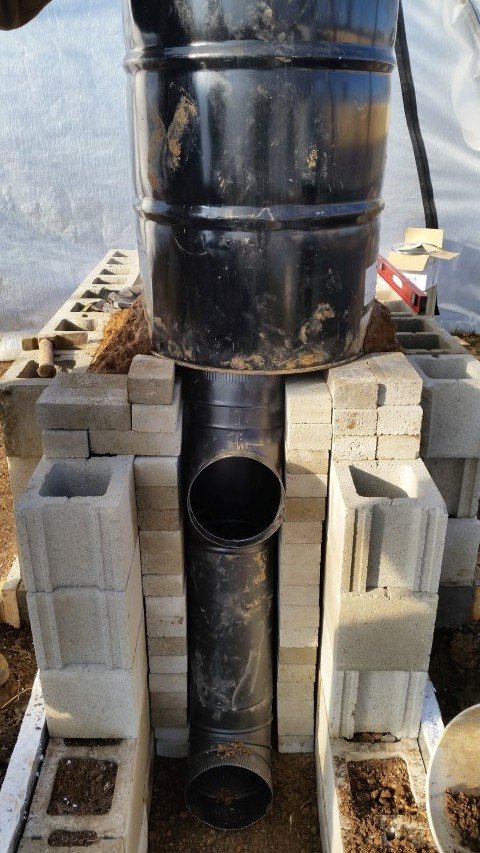
A “T” is spliced in near the top so that once the pipe is buried in gravel, one can still access the interior for visual inspection or to vacuum out ash. We back-filled in around the pipe with brick to support it and for additional thermal mass. The elbow at the bottom will connect directly to the long exhaust pipe running through the thermal mass.
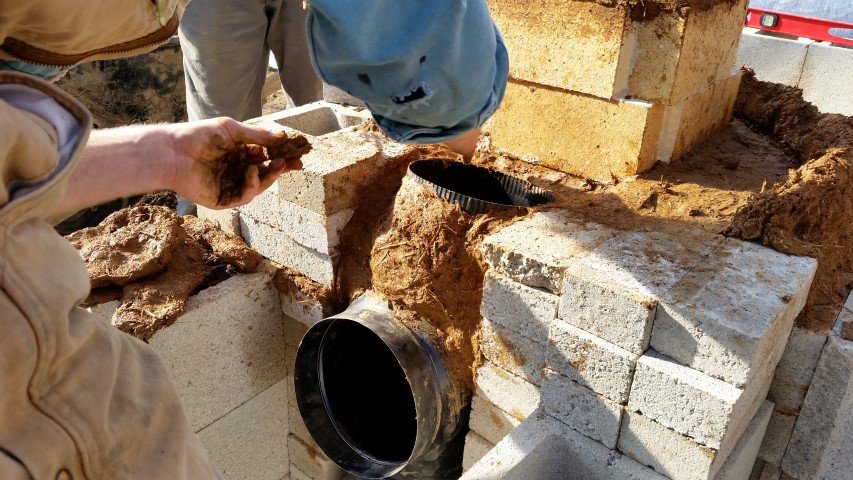
To maintain the integrity of the air-flow, all of the hot-gas/exhaust coming into the barrel must be funneled into the exhaust pipe. We don’t want smoke leaking out of the stove and into the greenhouse, so cob is used to seal around the entire flue pipe and the drum. With the drum removed one can also see how it is seated into the cob.
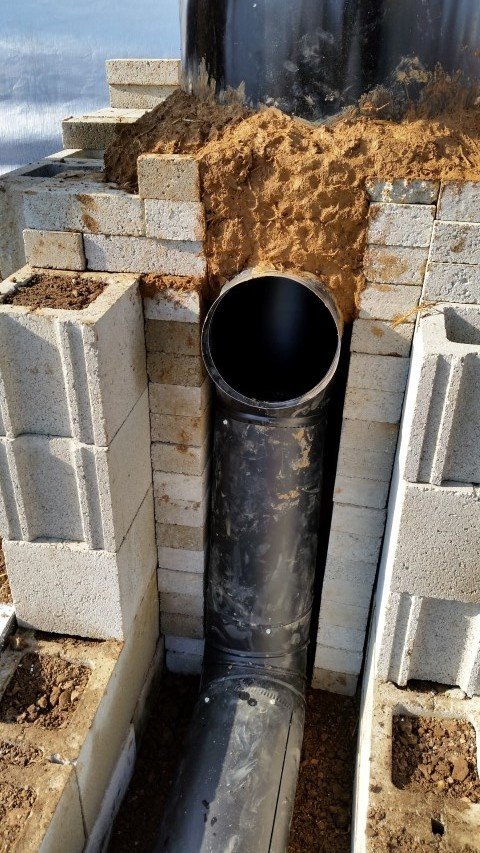
The drum is put back on, everything is cobbed into place, and the exhaust pipe connected.
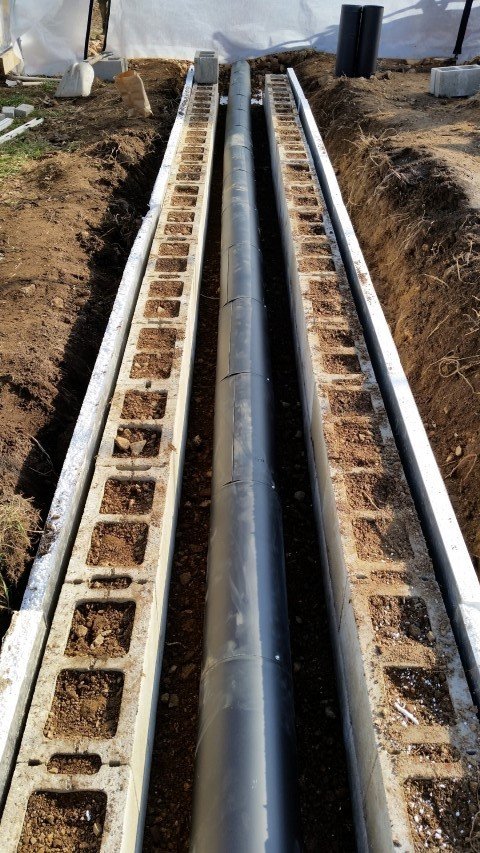
Speaking of the exhaust pipe, the 2-inch insulation board has be laid in on the floor of the thermal-mass trench, 3-4 inches of gravel added, and now the pipe has been assembled with a single screw holding each 2-foot section of pipe together. Remember, we are maintaining the 8″ flue pipe dimension (50+ square inches) throughout the entire system.
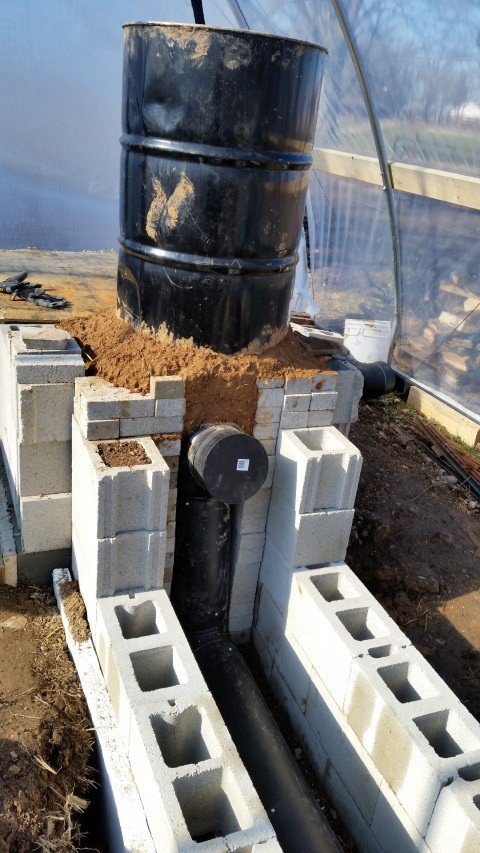
Note that the third layer of bricks has now been added to the trench walls and the thermal-mass bed is now ready to be filled to the top with gravel.
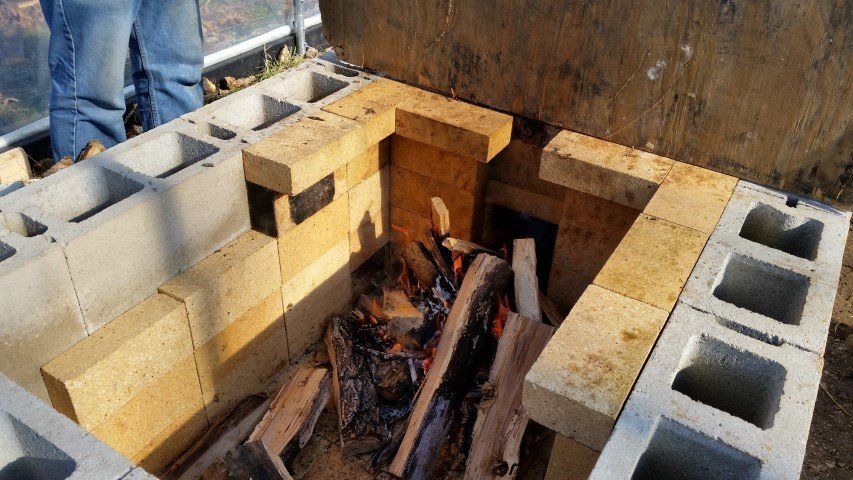
With the system mostly in place we couldn’t resist building a small fire to test it out. Even without a lid, once the fire was hot enough to heat the riser the stove began to rocket, pulling all smoke into the fire chamber. It Works…!!!
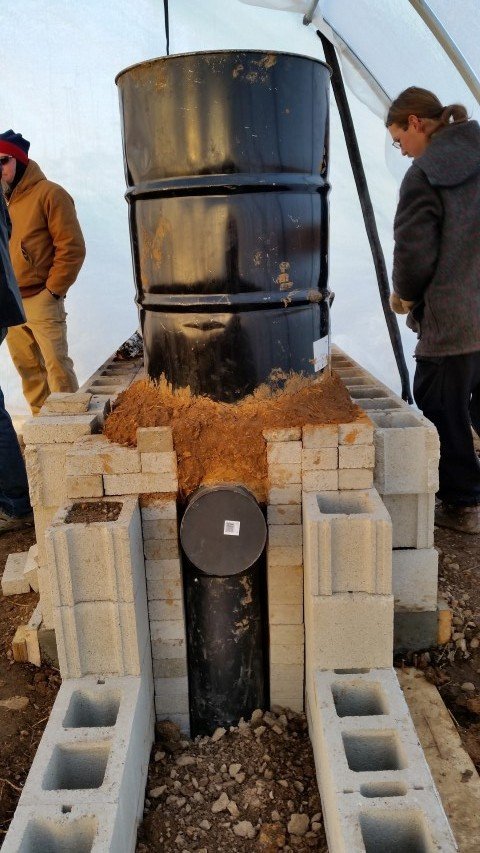
While tending the fire we started to fill the trench with gravel and observed how the cob was starting to dry out.
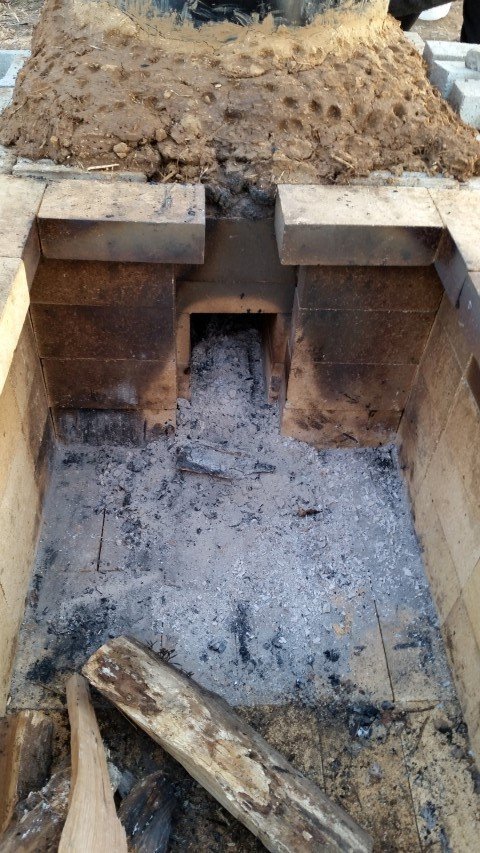
During lunch we let the fire burn out. You can tell from the burn pattern around the opening to the fire chamber how much hotter it is right there. From the picture you can also get a good feel for the size of the fire chamber. How many pieces of firewood like the one in the foreground can be added into the chamber at one time?
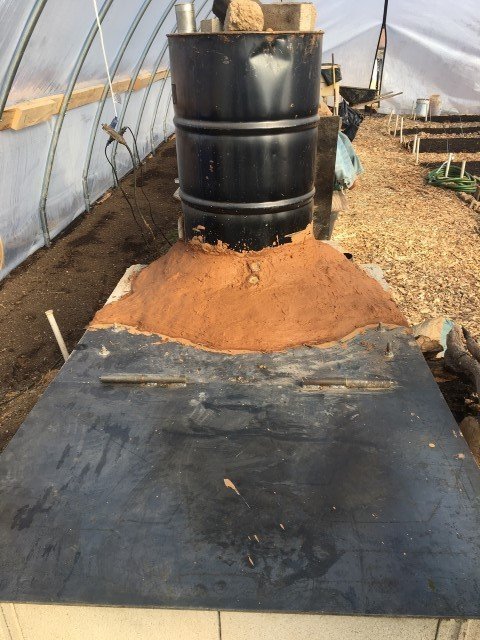
Shortly after the stove was complete, the farm had a local machine shop craft a steel plate with hinges for the top of the feed chamber. The shorter section was bolted down to keep the plate secure and in place for frequent opening and closing.
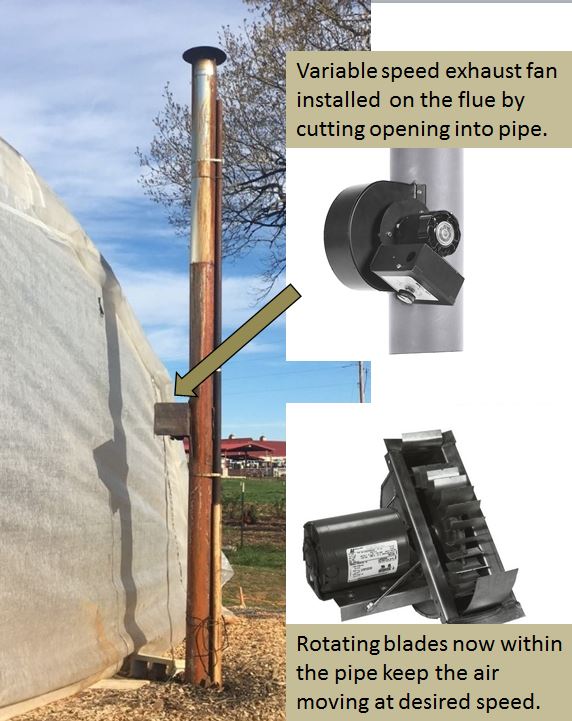
On the opposite end of the stove, a variable-speed fan was installed. It does use a bit of electricity and as far we know this is not a common feature of rocket mass heaters. It might even be considered to be a bit like cheating for if one builds a stove “correctly” it should not be necessary to add this feature. But we were not certain how the stove would perform due to the changes we made and we also wanted to have more control over the air flow. The goal is to only allow lukewarm air to leave the greenhouse for if it is hotter than this it means that the exhaust is moving through the gravel pit thermal-mass too quickly for the heat to be absorbed.
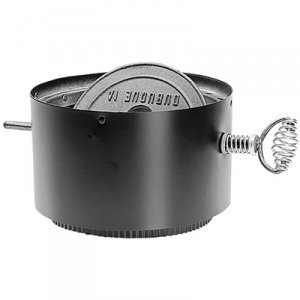
To help slow down the air flow a flue damper was was also installed just before the fan. So now we have the ability to slow down the exhaust flow or, speed it up with the fan. The fan is also wonderful to have when starting the stove to get the smoke pulling immediately into the fire chamber. Bottom-line… it has given the greenhouse team greater control which they appreciate.
8 Weeks Later…
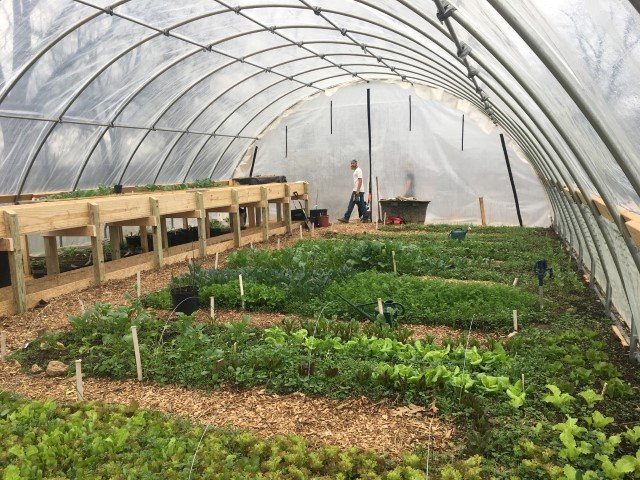
8 weeks later the farm team had all of the greens they could eat. The stove kept the greenhouse warm enough for good growth through January, February and into March.
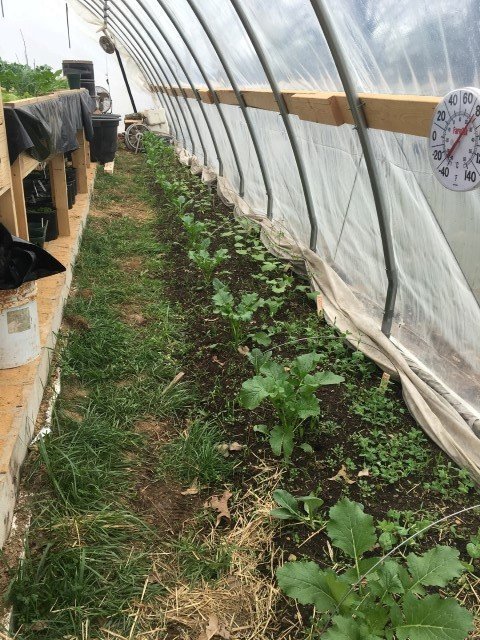
I wanted to show you this picture of the north wall of the greenhouse from the exit end of the thermal-mass trench. You can see the sand that was used to level the top of the trench, the grow beds that were built on top, and one of the fish tanks resting on the mass at the far end. The drum of the rocket stove is just visible. You can also see a fan that is mounted on the greenhouse that blows some of the warm air radiating from the stove (the steel lid and drum get hot) into the larger space.
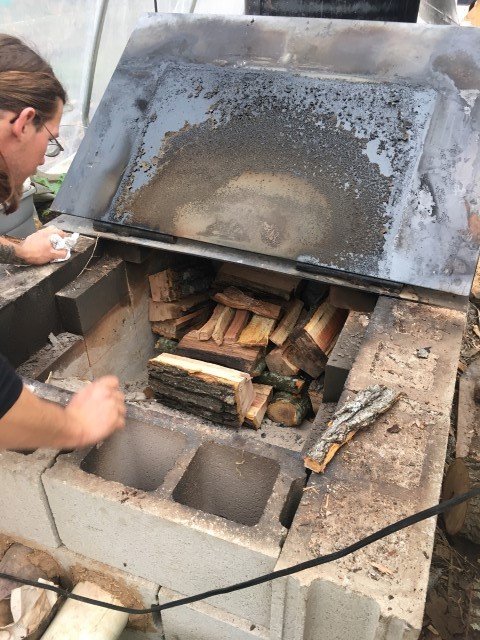
Jim has become expert at loading the stove for a good burn. Here he is getting ready to light a ‘small’ fire in the evening before a cool night.
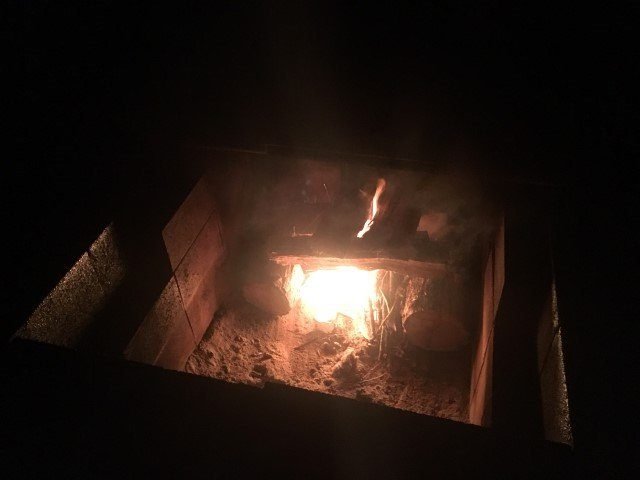
The fire at night.
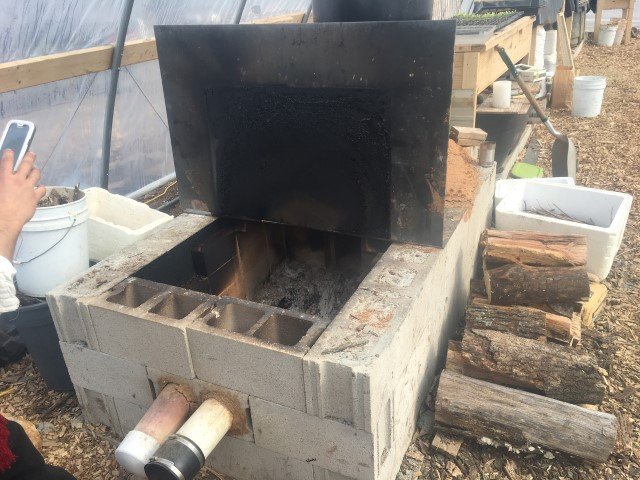
The next morning the fire is out but the greenhouse is 20 degrees warmer than the greenhouse next to it that is only now getting prepared for planting (early March).
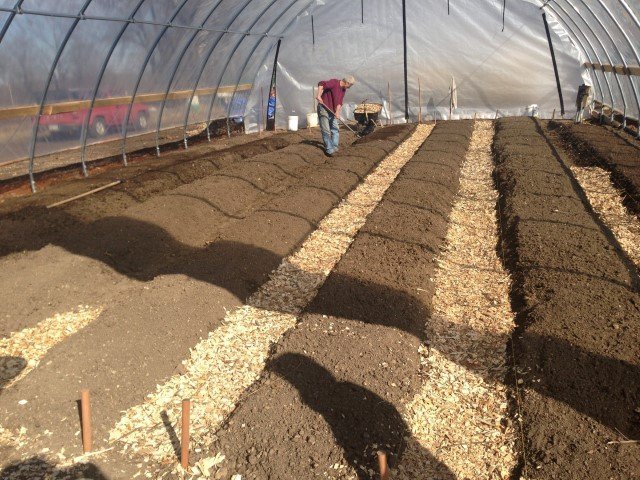
Greenhouse #2 (without a stove) being prepared for planting in early March.

Conclusions
- The system works to keep the greenhouse well above freezing.
- The first cob mixture had too much clay and not enough sand and aggregate, so it shrank and cracked, compromising the full integrity of the stove. We took the radiant barrel and riser off during our next PDC course so our students could see how the inner workings of the stove held up. It took about 2-hours to remix some cob and put it all back together.
- It was a fairly large investment (about $3,000 in materials plus labor) but to keep the greenhouse above freezing for just one winter using natural gas or LP, we estimated a cost of about $3,000 as well. So, we figure the stove paid for itself in two seasons (one year for materials, one year for labor).
- Could the stove function well without the damper and fan? Maybe, but having these options gives us greater control especially when starting the fire.
- For our next stove we are going to look for ways to create some kind of turbulence in the underground portion of the exhaust pipe to increase heat absorption in the surrounding gravel.
- As the fire cools and the draft slows down, the exit pipe outside cools quickly as well thus slowing the flow of exhaust gasses even more. Insulating the exhaust pipe should significantly improve air flow.
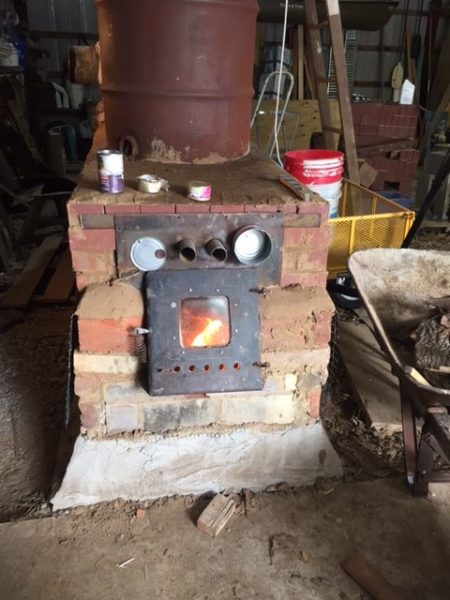
- A re-design of the fuel chamber door will be considered as well. When the lid is opened to check the fire or to add more wood, too much smoke escapes, filling the greenhouse with smoke. A front loading system is more difficult to load and clean, but it’s much more difficult for smoke to escape. Here is a picture of a unit our friend Michael Egan built a with large, front loading fuel box.
- Final note: This is a good time to remind the reader that 1/3 of the 4,000 acre farm is oak forest. There is plenty of wood available on site for the taking–a natural resource. This is why we are looking at wood burning technologies for various energy needs of the overall permaculture design of the farm. If this farm was on the prairie with few trees, we’d be looking more at various techniques to better insulate the greenhouse or possibly even switching to Earth Air Tubes to keep the greenhouse above freezing all winter with no supplemental heating at all.
2020 Update!
We have removed the entire stove system.
As surprising as this might appear it is a good lesson in non-attachment.
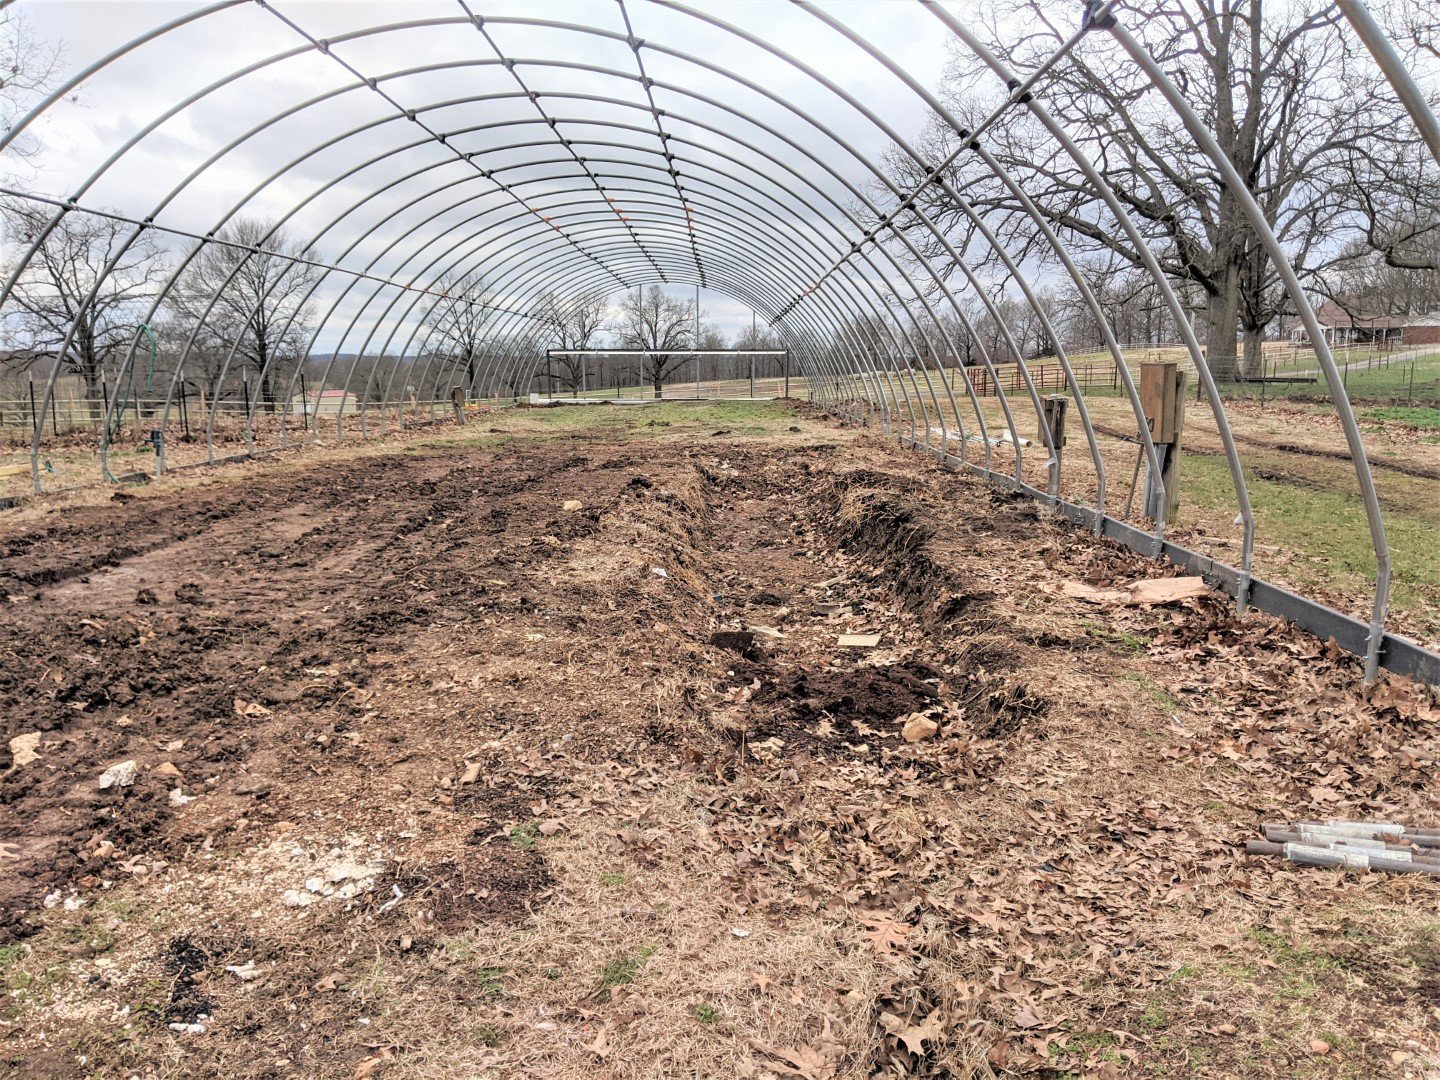
When we built the stove we had a small team of permaculture course graduates living on the farm and enjoying the greenhouse production throughout the winter months.
But plans change. For the past two years there has been no one living in this area of the farm so the greenhouse has been unused. At the same time our priorities for growing perennial-plant starts has loomed up with our plans to plant-out hundreds of acres into perennial production and food forests. So our need for non-heated nursery space has soared.
We decided that the greenhouse nursery space was more valuable to us than the rocket mass heater so… we took it apart and pulled it out.
Yes, this was hard to do but we learned so much from this project that we are grateful for the opportunity to build and operate such an epic rocket-mass stove.
This has been a good reminder to us to appreciate the work in front of us while doing our best at creating workable and compassionate, long-term solutions to the design challenges before us. Yes, we want good results, but we do our best and then come to accept whatever results. This is spiritual work I think to desire everything, need nothing, and understand what is showing up.
We are glad we could share this project with you and appreciate your interest and feedback. We will continue to take questions on this post and will answer to the best of our ability should questions follow.
And we will continue to post on our other projects should we think there is something we have learned that might add to the growing body of work focusing on how to leave the planet in better condition than when we arrived on it.
Be well… Keep in touch… Bill (March 19, 2020)
Note: We do take a good look into rocket stove theory and application at every one of our PDC courses.
Schedule of Upcoming PDC Courses Here.
Sample the Course!

Enter your email address to receive access. By signing up, you'll receive occasional email newsletters with valuable permaculture insights and updates on our courses. We respect your privacy and won't send spam. You can unsubscribe at any time.
